Do-it-yourself four-pitched roof of the house. Rafter system for pitched roof Quad pitched roof without supports
When building your own home, a lot of responsibility falls on your shoulders. You have to deal with a bunch of issues and participate in the construction process. After all, a reliable roof over your head will provide a comfortable life.
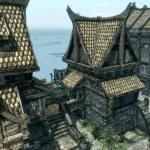
Difficulties always attract a person. After all, it is not in vain that they say: “We are not looking for easy ways.” This is what happens in construction. The four-pitched roof has a complex shape, giving the building a special look. This architecture attracts many. This type is especially popular in the construction of country houses. On a one-story house, a good option would be to build a hipped roof.
In this article
View
The location on different sides of 4 slopes gives your home a solid look. Often, the slopes have a different shape: a pair of them is obtained in the form of a triangle and plays the role of a pediment, and some are shaped like a trapezoid.
Difficulties with a hipped roof during calculations and installation scare away many who wish, but if you do not doubt your abilities, then you can safely build it.
Design Benefits
A four-pitched roof with your own hands has the following advantages:
- the absence of gables makes the roof more durable and resistant to gusts of wind. This type of roof is suitable for areas with windy weather conditions;
- the presence of 4 slopes more effectively copes with the removal of melt and rain water, as well as snow;
- the attic space becomes more spacious, which is ideal for the location of the attic;
- the construction of a 4-pitched roof will cost no more than other types.
Types
When making a hipped roof with your own hands, you can distinguish several of its subspecies:
- hip - is a classic option. It has 2 triangular hips and 2 slopes in the shape of a trapezoid;
- half-hip - has slightly shortened slopes. Perfectly used for the attic;
- tent - executed in the form of a pyramid. Ideal for a square building.
Project
Before proceeding directly to construction, it is necessary to create a roof project in order not to make mistakes in the future. How to build a roof? In this case, a step-by-step instruction will help. Having familiarized ourselves with the design of the house, proceed to the following:
- we calculate the angle of inclination of the slopes, based on indicators such as wind load, precipitation in your area, type of roofing material. In areas with strong gusts of wind, it is advisable to make the angle of inclination less than 30 degrees, thus, the windage will decrease. In areas that are constantly flooded with precipitation, the desired roof angle is not lower than 65 degrees to prevent the accumulation of snow and water. In areas with a more or less stable climate, a roof from 40 to 50 degrees is perfect. For each type of material, the manufacturer indicates the lowest operating angle;
- we calculate the height of the ridge using a series of simple geometry formulas.
Rafter system design
The truss system of the hipped roof forms the roof frame. It is made up of the following elements:
- mauerlat - a beam located along the perimeter of the walls and distributing the load on them. The four-pitched roof has 4 beams. If the house is wooden, then the blocks of the upper crowns will be the Mauerlat. In a brick house, a concrete belt is created over the walls, into which special studs are embedded. Then the Mauerlat is attached to them;
- the ridge beam, or run, is above all elements. The upper part of the rafters is attached to it. At a 4-pitched roof, it is less than the length of the house;
- rafter legs - boards that create the geometry of the slopes. Their cross section is 50 x 150 mm. A four-pitched roof uses 3 types of rafters: slanting, ordinary, outdoor. Installation of ordinary rafter legs is carried out on slopes in the form of a trapezoid. Sloping rafters are made from a more durable material, since the load on them is greater. The upper part of the slats rests on the ridge run, and the lower part rests on the angle of the Mauerlat. The hip is formed by outdoor rafters. They focus on the diagonal rafter legs and the support beam;

- bed - a bar that lays a supporting wall located inside the building. Functionally, the bed transfers the weight and distributes it to the foundation;
- vertical supports - racks, mounting takes place on a bed. They are a support for the middle of the rafters and run;
- rafter leg, or brace. The angle of its installation is 45 degrees to the rafter. The emphasis is on the rack. It is used so that the rafters do not sag, to transfer part of the weight to the bearing wall;
- sprengel is used to support the rafters. This is a vertical support, similar to a rack. Sprengel farms are used most often;
- puff, or bolt, - bars of a horizontal position that grab the rafter pairs in the upper and lower parts;
- filly - boards that extend the rafters and protect the walls from dampness, forming a roof overhang.
Installation procedure
A four-pitched roof begins with the installation of a Mauerlat, which we lay along the perimeter of the walls. Its cross section is 150 x 150 mm. When placing it is necessary to control its level. The beam should be located 5-7 cm from the edge of the wall. Fastening is carried out on pre-walled studs. Nuts are screwed on top. Such a beam will connect the design of the rafters and the walls of the house into a single whole.
To install racks, you need a bed and floor beams. The size of the beam of such elements is 100 x 200 mm. Installation of supports is carried out vertically with fastening with plates or a corner. When using a hip roof, the racks are placed in 1 row, and a run is attached on top. The hipped roof involves the placement of supports diagonally. Equal distances are laid off from the corner. Thus, a rectangle is obtained on which the runs are laid. We fix everything with the help of a corner.

Roof truss installation
The next step is to make rafter templates. We install side rafters on them. A thin board is suitable for blanking. We apply it to the run and mark it washed down. With the second end, which is located at the Mauerlat, we also note washed down. We make the required number of rafters using a template. After choosing the mounting step, we make the installation. The step can be from 60 cm to 1 m. We make the connection with self-tapping screws.
The angle of inclination of the slope is determined by the rafters. They are arranged diagonally for additional load. Often double boards are used for them. We also make cuts according to the template. The upper part of the rafters is connected with a crossbar to give strength.
The hipped roof connects the rafters near the ridge using puffs. Installation occurs at an angle of 90 degrees. We connect with wire clamps to the walls.
We fasten the sprigs to the diagonal rafters. Their length can be varied, but they must be parallel to each other. Ordinary and outdoor rafters together form side slopes.
The four-pitched roof with their own hands came to an end. The last step is its insulation with basalt wool or expanded polystyrene. We lay the material between the rafters. A layer of waterproofing will protect from moisture. The crate directly depends on the type of roof material.
In this video, you can learn more about the construction and design of a four-pitched hip roof:
After the publication of an article about the construction of a gable roof with my own hands, many letters began to come to my mail asking me to show how a four-slope hip roof was being built. Indeed, this version of the truss system is quite popular, but its construction is more difficult than the same gable roof or even a broken one.
This complexity is associated with the presence of corner rafters in the design. In different sources they are called differently - diagonal, oblique, hip ... I will use the term angular for simplicity.
When describing the construction of a gable roof, I also used a structure in which the rafters rest on the floor beams of the floor below. Now, for a change, we will consider an example when the rafters rest directly on the Mauerlat.
So, let's say we have a foot of a house measuring 7x11 meters. Its height is 3.5 meters. Under the roof we will have an unheated attic. The pictures below show how we installed the attic floor and the mauerlat (click on the picture to enlarge the images).

The calculation of the section of the floor beams was made in the program described. I chose a section of 100x200 mm.
 The beams were calculated as loaded with a distributed load. The step of the beams is the maximum possible with such a section of 0.7 meters. When calculating attic floors, I always use a standard distributed load of 300 kg / m². Here, 200 kg / m² falls on the weight of the floor itself with insulation and 100 kg / m² is added as a temporary load from people who will move along the floors during the construction of the roof and possibly during operation (some people store various things in the attic).
Design load "Load(calc.)" is determined by increasing the standard load (in this case by 10%) to provide a greater margin of safety.
Floor beams, in order to evenly distribute the load, we installed on a board with a section of 50x150 mm. This is especially important for the load-bearing partition, because in addition to the ceilings themselves, it will also bear part of the load from the roof. As a bar 100x150 mm is used.
Any four-pitched hip roof begins with the installation of a ridge beam. Accordingly, we need to rely on something. If there is a load-bearing partition under the ridge beam, then everything is simple - we rely on it.
In our example, the load-bearing partition in the house is located perpendicular to the future ridge. It is impossible to lean the skate on the floor beams, because. their cross section was not calculated for this. Therefore, we proceed as follows. On the Mauerlat, we install the carrier beam strictly in the middle. It consists of two boards with a section of 50x200 mm (see pictures). The gap between them is 50 mm. Why exactly two boards - it will be clear below.

 Pay attention to where the inserts between the boards are (right figure - the size of 676 cm is measured with a tape measure; dividing this value by 2 and subtracting 2.5 cm from it - we get the desired size). These inserts are made from scraps of a 50x150 mm board and are firmly sewn on with nails.
 Now we collect the so-called "bench". Racks from boards 50x150 mm, ridge timber from a board 50x200 mm. We put the racks strictly vertically in level (or plumb) on the inserts shown above. Each post is fixed with temporary braces (the figure shows the braces on only one post). All connections are made with self-tapping screws so that they can be easily disassembled. Why - it will be clear later.
The height of the racks is determined by the method mentioned in the article about the broken mansard roof. Those. before starting construction, it is necessary to draw on paper a sketch of the box of the house and the future roof on a scale (the larger the drawing, the more visual it is). The sketch is drawn based on personal aesthetic preferences.
From the resulting scheme, we determine the height of the racks. In this example, I am quite satisfied with racks 2.5 meters high.
The next step will be the manufacture and installation of rafters resting against the ridge beam. In order not to get confused, let's call them ordinary rafters. The calculation showed that as ordinary rafters in our example (region - Nizhny Novgorod region, roof - metal tiles) you can use boards with a section of 50x150 mm in increments of 0.6 meters.
To begin with, we will make a template from an inch board 25x150 mm. The order of its markup is shown in the figures below:
I'll explain a little. We take an inch board of suitable length. We apply it as shown in the left picture. We mark the upper washed down as shown in the middle figure using any bar 5 cm high. This height is equal to the depth of the washed down rafter at the junction with the Mauerlat. Usually I take this depth equal to about one third of the height of the rafter section. That is, for example, if the rafters were from a board 50x200 mm, then the washed down would be 7 cm deep.
The lower part of the template is laid out in accordance with the right figure. We washed down the rafters on the Mauerlat again using any bar 5 cm high. Then, measuring 40 cm from the outer surface of the wall (our cornice overhang will be this wide), draw a vertical line along the level or plumb line.
In the right figure, you can see that when marking the template, it turned out that the top row of facing bricks interferes with us. So we just took it off. It was possible to knock out individual bricks at the places where the rafters were installed. I already wrote earlier that it is not necessary to load the facing masonry with a roof.
So, the template for ordinary rafters is ready. Of course, building a box at home, as well as installing a Mauerlat and a ridge beam in compliance with ideal geometry is very difficult. There will always be errors. Therefore, before preparing the next rafter, take a template and attach it in the place where this rafter will be placed. If you see any inconsistencies, immediately take them into account when making the rafters. Perhaps it will need to be lengthened by a few millimeters or vice versa shortened. In general, in the process of work, everything will become clear.
 After all the ordinary rafters are installed and secured, in this example, before installing the corner rafters, I would unload our middle carrier beam (which is from 2 boards 50x200). To do this, we remove the racks on which we put the ridge beam. At this point, the load will be completely distributed on the walls of the box at home. And now we shorten our racks a little and put them in place. They should enter between the ridge and the beam freely with minimal effort (do not hammer them with a healthy hammer).
If our racks were not based on a beam, but on a load-bearing partition, we would have skipped this step.
Now let's move on to the most interesting - the manufacture and installation of corner rafters. The corner rafter must simultaneously be located immediately in 2 adjacent planes of the slopes. This is a prerequisite for the fact that the crate and roof will be even without deflections. Different builders do it differently. Let me tell you how we do it.
The calculation of the cross section of the corner rafters is quite complicated, it makes no sense to delve into it. We always make them from 2 boards of the same section sewn together as ordinary rafters. This practice has been verified by many years of experience of many builders. I can vouch for reliability, of course with the installation of the necessary props (we will talk about them below).
To begin with, at each corner, directly to the Mauerlat, we attach two sawn (see. Fig.) Cutting boards (50x100 mm) about 30 cm long. The cuts are made at an angle of 45º.
Further, at any corner from which we decided to start, we fasten a piece of board (in this case, 50x150 mm) according to the figure. Pay attention - the plane of the bar facing us coincides with the line connecting the inner and outer corners of the Mauerlat. In short, the bar stands in the place where the right board of the future corner rafter will stand.
Now, on an ordinary rafter, we measure the size shown in the figure with a square and mark it on the installed bar. Let's call the resulting point - point 1. Screw a self-tapping screw into it.
At the top, according to the figure, we make the markup. The size of 10 cm is the thickness of the corner rafter. The main thing is that the triangle is isosceles. Let's call the point on the right (marked with a small dash in the figure) - point 2. We also screw a self-tapping screw into it.
Between points 1 and 2 we pull the lace (shown in blue). Then we take any small piece of a board 15 cm wide (the same as that of the rafters) and, combining its upper edge with a cord (see figure), rest this piece against the Mauerlat. At the point of contact, draw a mark with a pencil and measure the size of the support of the corner rafter (in this case, 11 cm). Let's call this mark - point 3.
Now we need to measure the angle of inclination of the corner rafter. To do this, we use malka. It is better to purchase a Malka with a protractor assembly (left picture). If you couldn’t find one, you can also use a simple bevel plus an ordinary school protractor (middle picture). Which angle we measure is shown in the right figure:
We apply the resulting blank at the top (see the left figure) to our point 2 and, combining it with the lace, draw lines parallel to the ordinary rafter on the right with a pencil. We make a new gash along these lines. What should happen can be seen in the right figure. The figure also shows that at the lower point of contact between the template and the ordinary rafter, we put another mark. Let's call it Point 4.
Finally, we remove the lace, measure the distance between points 3 and 4 with a tape measure and make a corner rafter. The sequence is this: we measure the overhang of an ordinary rafter. Above in the figure, which shows an ordinary rafter with dimensions, the size we need is 0.67 meters. Let's multiply this value by 1.5. To the resulting figure, add the distance between points 3 and 4. So we get the length of the corner rafter blank. This length is made with a sufficient margin. The overhang will turn out to be more than necessary, it is cut already in place when the cornice is made.
Now we sew two boards 50x150. With a large length of the workpiece, we join the boards - we make joints in different places. I think everything is obvious here. Using the template, we mark and saw down the upper end of the right board. Then, as if making a mirror image, we saw down the left board. We set aside the distance between points 3 and 4 on the workpiece (from where it should be clear from the figures above). We make the bottom cut while maintaining the angle α and our support size of the corner rafter is 11 cm. Now the rafter can be put in place and fixed.
For other corner rafters, we make all the cuts the same. The only thing that can be clarified is the distance between points 3 and 4.
 The most loaded point of the corner rafter is at a distance of 1/4 of the span from the top point. Therefore, here you need to put additional racks. As I said, in our example, racks cannot be placed on floor beams, so we put additional beams under them with a section of 100x200 mm.
Now we need to make and install the so-called "spiders". Here, in principle, everything is not as difficult as it might seem. To begin with, on the Mauerlat with a pencil, we make markings with the necessary step (0.6 meters) and mark the places where the sprigs will stand.  Now we are making the shortest extreme sprig right in the place. Its lower cuts and the length of the overhang are marked according to the pattern of ordinary rafters that we have left. They are the same. The upper gash can be done right on the spot without any complicated constructions. The handler is not heavy. They took it, twisted it, figured it out, corrected the top gash with a chainsaw a couple of times and everything will work out. If the spear moves a few centimeters to the left or right along the Mauerlat, this is not scary. The main thing is to ensure that, when viewed from above, the angle between it and the Mauerlat is 90º. I think this is understandable.
Now we can use this short conch as a template for everyone else. The cuts are all the same, only the length is different.  See the figure: we measure the length of an ordinary rafter and subtract from it the length of the short rafter made. The resulting figure is divided by the total number of sparrows in the corner. After all, we made markings on the Mauerlat and we know how many there will be. In our case, five. So, we got the distance by which the length of each subsequent sprig will differ. Those. we have a short one, add this distance to it, we get the length of the next one and so on. I am sure that if you build the roof yourself and reach this stage, then you will not have any problems here.
Now a small digression. If the span covered by the corner rafter is more than 7.5 meters, in addition to the rack installed by us, you need to put an additional rack at a distance of 1/4 of the span from the lower support point. If the ceilings allow, we put a rack on them, or we make the so-called "sprengel" (see fig.).
If the span is more than 9 meters, we put more racks in the middle. Well, here, accordingly, it will be necessary to strengthen the ordinary rafters. In the process of their calculation, this will become obvious.
So, back to our roof. Now you need to make a cornice overhang. In this article, I will not delve into the process. Tired of writing. I will give only a few drawings, from which I think everything will be clear.
This is where I would like to finish. Of course, the more complex the process, the more difficult it is to describe it in an understandable and accessible form. Nevertheless, I hope that people who decide to build a hip roof with their own hands will figure it out and they will definitely succeed. Any questions or additions on the topic, write in the comments. Let's discuss.
And one more observation. According to my personal prejudice, the hip roof in its purest form, as we built it in this article, looks kind of boring. It simply transforms if you make at least one dormant window.

Warning: Use of undefined constant WPLANG - assumed "WPLANG" (this will throw an Error in a future version of PHP) in /var/www/krysha-expert.php on line 2580
Warning: count(): Parameter must be an array or an object that implements Countable in /var/www/krysha-expert.php on line 1802
The four-pitched (hip) roof is considered one of the most complex structures. Like any, it has its advantages and disadvantages. To make an informed decision, you need to familiarize yourself with the actual performance characteristics of a hipped roof.


disadvantages


As you can see, the advantages of a hipped roof are doubtful, and the disadvantages are significant.
Practical advice. Professional builders recommend choosing hipped roofs only in exceptional cases, when other options are unacceptable for various reasons.
Types of hipped roofs
Each country has its own building traditions and style preferences. What types of hip roofs are used by architects?
Table. Types of pitched roofs.
| Hip roof view | Short description |
|---|---|
| The simplest roof has two hip slopes of a regular triangular shape and two inclined trapezoidal ones. The lower the angle of inclination of the slopes, the more you can make an overhang to protect the facade and the local area. |
| All slopes converge at one point, the roof ridge is missing. It is used as a covering of buildings of the correct square shape. |
| A successful attempt to improve the classic hip roofs. The hip slopes are slightly lowered, which allows you to install small windows. It has a significant drawback - due to the installation of windows, the already difficult installation of the truss system is even more complicated. There are more complex options for such a roof - another small hip slope is made above the window. |
| It has low gables and small hips above them. A feature of this design is that all rafter legs rest on parallel load-bearing walls. Due to this, the design is slightly simplified and the attic space is increased. |


![]()


There are no universal recommendations for choosing the type of a hipped roof; each developer must make a decision on his own or after consulting with architects. But you should always remember that there are other, cheaper and more successful options for truss systems.
Step-by-step instructions for building a hipped roof
For example, consider the variant of the simplest of the listed types of hip roofs - the classic one. But even such a simple hip roof design is much more complicated than any gable roof.


Important. You can start building a hip roof only after the professionals have made all the calculations. The best option is to order a house project in the relevant organizations. This will be much cheaper than restoring the structure after its destruction.
Building a frame for a roof with four slopes is a difficult process with characteristic technological features. During the construction, their own structural components are used, the sequence of work is different. But the result will amaze with its spectacular shape and durability when repelling atmospheric attacks. And the home master will be able to be proud of his personal achievements in the field of the roofer.
However, before deciding on a device of a similar design, it is worth familiarizing yourself with the algorithm according to which the truss system of a hipped roof is being built and with the specifics of its device.
The hipped roof class combines two types of structures that resemble a square and rectangular envelope in plan. The first variety is called tent, the second - hip. Against the background of their pitched counterparts, they are distinguished by the absence of gables, called tongs in roofing. In the construction of both variants of four-pitched structures, layered and hanging rafters are used, the installation of which is carried out in accordance with standard technologies for the construction of pitched truss systems.
Characteristic differences within the four-slope class:
- At the hipped roof, all four slopes are in the form of isosceles triangles, the tops of which converge at one highest point. There is no ridge as such in the tent construction; its function is performed by the central support in layered systems or the top of the hanging truss.
- At the hip roof, a pair of main slopes has a trapezoidal configuration, and the second pair is triangular. The hip design differs from the tented counterpart in the obligatory presence of a ridge, to which the trapezoid adjoins the upper bases. Triangular slopes, they are also hips, adjoin the ridge top, and their sides are docked with the inclined sides of the trapezoid.
Based on the configuration of the roofs in the plan, it is clear that it is customary to erect tent structures over square buildings, and hip structures over rectangular houses. Both soft and soft are suitable as a coating. The characteristic square or rectangular shape is repeated by the drawings of the four-pitched roof truss system with a clearly marked arrangement of elements in the plan and vertical projections of the slopes.
Often, hip and hip systems are used together in the construction of one object or effectively complement gable, single-pitched, broken and other roofs.

Structures with four slopes can be based directly on the upper crown of a wooden house or on a mauerlat, which serves as the upper strapping of brick or concrete walls. If you can find upper and lower supports for each rafter, the roof frame is constructed using layered technology.
Installing rafter legs is easier and more affordable for the inexperienced home roofer who needs to consider that:
- With a rigid fastening of the upper and lower heels of the rafters with metal corners or with the help of a wooden support plate, a reinforced Mauerlat fastening will be required, because the spacer will be transferred to it.
- With a rigid fixation of the upper heel and a hinged fastening of the bottom of the rafter, it is not necessary to strengthen the fastening of the Mauerlate, because. when the load on the roof is exceeded, the hinged mount, for example, on sliders, will allow the rafter to move slightly without creating pressure on the Mauerlat.
- With a hinged fastening of the top of the rafters and a rigid fixation of the bottom, the spacer and pressure on the Mauerlat are also excluded.
The issues of fastening the Mauerlat and the method of installing the rafter legs, which are closely related to it, according to the rules, are resolved at the design stage of the house. If the building does not have an internal load-bearing wall or it is not possible to build reliable supports under the central part of the roof, nothing will do except for the hanging assembly scheme of the truss system. True, in most cases, a layered method of construction is used, for the implementation of which it is necessary to foresee the bearing support inside the building in advance.


In the construction of truss systems for tent and hip hipped roofs, specific structural elements are used, these are:
- Diagonal rafter legs forming the ridge joints of the slopes. In hip structures, diagonals, they are also rafters, connect the consoles of the ridge run to the corners of the roof. In tent systems, slanted legs connect the top to the corners.
- Narozhniki, or truss semi-legs, installed perpendicular to the cornices. They rely on diagonal rafters, are located parallel to each other, therefore they differ in different lengths. Narozhniki form the planes of tent and hip slopes.
Diagonal rafters and joists are also used for the construction of valleys, only then concave roof corners are arranged, and not convex like hip ones.

The whole complexity of building frames for roofs with four slopes lies in the installation of diagonal rafters, which determine the result of the formation of the structure. In addition, the slopes are required to steadfastly hold a load one and a half times greater than ordinary truss legs of pitched roofs. Because they work part-time as a hobby, i.e. support for the upper heel of the sprigs.
If you briefly describe the procedure for building a layered frame for a hipped roof, then you can meet the following steps:
- Mauerlat device on brick or concrete walls. The process of installing a Mauerlat on walls made of logs or timber can be abolished, because. it can be successfully replaced by the upper crown.
- Installation of a central support for a hipped structure or a supporting frame for the main part of a hip roof.
- Installation of ordinary layered rafters: a pair for a hipped roof and a row defined by the design solution for a hip structure.
- Installation of diagonal rafter legs connecting the corners of the systems with the top of the support or the extreme points of the ridge.
- Production by size and fastening of sprigs.
In the case of using a hanging frame scheme, the start of the construction of the hipped frame will be the installation of a triangular truss truss in the center. The installation of a series of truss trusses will be the beginning of the installation of a four-pitched hip truss system.


Construction of a hip truss system
Let's take a look at one of the common examples of a hip roof device with layered rafter legs. They will have to rely on floor beams laid on top of the Mauerlat. Rigid fastening with a notch will only be used to fix the top of the rafter legs on the ridge run, so there is no need to strengthen the Mauerlat fasteners. The dimensions of the box of the house shown in the example are 8.4 × 10.8 m. The actual dimensions of the roof in the plan will increase on each side by the amount of the cornice overhang, by 40-50 cm.

Mauerlat base device
Mauerlat is a purely individual element, the method of its installation depends on the material of the walls and the architectural features of the building. The method of laying the Mauerlat is planned according to the rules during the design period, because for reliable fixation of the Mauerlat it is recommended:
- Lightweight foam concrete, gas silicate and similar walls should be equipped with a reinforced reinforced concrete belt, poured around the perimeter, with anchors installed during the pouring period for attaching the Mauerlat.
- Brick walls should be edged with a side in one or two bricks along the outer edge so that a ledge is formed along the inner edge for laying a wooden frame. During masonry, wooden plugs are laid between the bricks for attaching the mauerlat with brackets to the wall.
A Mauerlat is made from a bar measuring 150 × 150 or 100 × 150 mm. If the operation of the under-roof space is supposed, it is advisable to take the bars thicker. The timber is connected into a single frame with oblique cuts. Then the joints are reinforced with self-tapping screws, ordinary nails or capercaillie, and the corners are reinforced with brackets.
On top of the Mauerlat aligned to the horizon, constructed in the best way for a particular building, floor beams are laid. A bar with a section of 100 × 200 mm is used. First of all, a beam is laid, passing exactly along the central axis of the building. In the example, the length of the beam for the construction of solid beams is not enough, because they are assembled from two beams. The docking point should be located above a reliable support. In the example, the support is an internal load-bearing wall.
The step between the floor beams is 60 cm. If the equipped box does not have ideal parameters, as it happens in most situations, the distance between the beams can be slightly changed. Such an adjustment allows you to slightly "make up" the flaws in the construction. Between the extreme beams on both sides and the walls of the house there should be a gap of 90 cm wide, necessary for the installation of extensions.

Because floor beams can independently form only two cornice overhangs, short half-beams of floor - extension are attached to their ends. They are first installed only in the area of \u200b\u200bthe main part of the hip roof, exactly where the rafter legs are to be mounted. They are nailed to the mauerlat with nails, fastened to the beam with screws, large-caliber nails, dowels, reinforce the fasteners with corners.
The construction of the ridge
The central part of the hip roof is an ordinary gable structure. The rafter system for her is arranged according to the rules that dictate. In the example, there are some deviations from the classical interpretation of the pitched principle: the bed is not used, on which, traditionally, supports for the ridge run are installed. The work of the bed will have to be performed by the central floor beam.
In order to build the ridge part of the hip roof truss system, you need:
- Build a support frame for the rafter legs, the top of which will rest on the ridge run. The run will be based on three supports, the central of which is installed directly on the central floor beam. To install the two extreme supports, first two transverse bars are laid, overlapping at least five floor beams. Stability is enhanced with two struts. For the manufacture of horizontal and vertical parts of the support frame, a bar with a section of 100 × 150 mm was used, the struts were made from a board of 50 × 150 mm.
- Make rafter legs, for which you must first make a template. A board of suitable dimensions is applied to the installation site, lines of future cuts are drawn on it. She will be the template for the in-line production of rafters.
- Install the rafter legs, resting them with a notch on the ridge run, and with the lower heel on the take-out located opposite.
If the floor beams were laid across the box, then the rafters of the main part of the roof would rest on the floor beams, which is much more reliable. However, in the example, they rely on the removal, therefore, additional mini-supports must be arranged under them. These supports should be positioned so that the load from them and the rafters located above is transferred to the walls.

Then three rows of extensions are mounted on each of the four sides. For the convenience of implementing further actions, the contour of the roof is drawn up with a cornice board. It must be nailed to the floor beams and extensions strictly horizontally.
Installation of corner offsets
In the space limited by the cornice board, there were corner sections left unfilled with details of the truss system. Here you will need corner offsets, for the installation of which is carried out as follows:
- In order to indicate the direction of installation, we pull the cord. We stretch from the point of conditional intersection of the extreme support of the frame with the floor beam to the corner.
- From above, along the lace, we apply a bar to its place. Holding the bar, from below we outline the lines of saw cuts at the point where the bar intersects the floor beam and the corner connection of the cornice boards.
- We attach the finished takeaway with sawn off excess to the Mauerlat and to the floor beam with corners.
The remaining three corner extensions are manufactured and mounted in the same way.

Installation of diagonal rafters
Diagonal, they are also slanting, rafter legs are made of two boards sewn together with a cross section equal to the size of ordinary rafters. In the example, one of the boards will be slightly higher than the second due to the difference in the angles of the hips and trapezoidal slopes.
The sequence of works for the manufacture and installation of the braids:
- From the highest point of the ridge, we stretch the lace to the corners and to the central point of the slope. These are auxiliary lines along which we will mark the upcoming cuts.
- With a carpenter's goniometer - we measure the angle between the lace and the upper side of the angular offset with a small one. This determines the angle of the lower cut. Suppose it is equal to α. The angle of the upper cut is calculated by the formula β = 90º - α.
- At an angle β, we cut down one edge of an arbitrary trimming of the board. We apply it to the place of the upper attachment, aligning the edge of this blank with the cord. We outline the excess that interferes with a tight installation. You need to cut again along the marked lines.
- At an angle α, we saw off the lower heel on another piece of board.
- We make the first half of the diagonal rafter using the patterns of the upper and lower support. If a solid board is not enough in length, two pieces can be spliced. You can splice them with a meter-long piece of an inch planted on self-tapping screws, it should be placed on the outside of the oblique leg being constructed. We install the finished first part.
- We do the second part of the rafter in the same way, but we take into account that it should be slightly lower than its first half. The area where the boards are connected into one element should not coincide with the area where the boards are joined in the first half of the sloping.
- We sew two boards with nails in a run-up with a step of 40-50 cm.
- On a lace stretched to the center of the slope, we draw a line along which it will be necessary to adjust the cut to join it with the adjacent rafter.
Following the described algorithm, it is necessary to install three more diagonal legs. Under each of them, supports should be installed at the point of attachment of the corner offsets to the beams. If the span is more than 7.5 m, another support is installed diagonally closer to the ridge.


Manufacturing and installation of hip rafters
The lace between the top of the skate and the center of the slope is already stretched. It served as an axis for outlining the cuts, and now you need to measure the angle γ along it and calculate the angle δ \u003d 90º - γ. Without deviating from the proven path, we prepare templates for the upper and lower support. We apply the upper trim to the place intended for it and mark the cut lines on it for a tight fit between the diagonal rafters. According to the blanks, we make the central leg of the hip and fix it where it is supposed to.
In the space between the corner outriggers and the cornice board, we install short extensions to stiffen the structure and to ensure a strong fixation of the shortest, shortest outriggers. Next, you should start making templates for the sparrows themselves:
- We cut the board cut at an angle δ and attach it to the place of attachment to the diagonal rafter.
- In fact, we outline the surplus that needs to be cut down again. The resulting template is used in the manufacture of all sprigs, for example, the right side of the hip. For the left side, the upper template will be filed from the opposite side.
- As a template for the lower heel of the sprigs, we use a piece of board sawn off at an angle γ. If all the previous steps were performed correctly, then this template is used to make the lower attachment points for all other sprigs.
In accordance with the actual length and "indications" of the templates, sprigs are made, which are necessary for the formation of the hip planes and the parts of the main slopes that are not filled with ordinary rafter legs. They are installed so that the upper attachment points of the sprigs to the diagonal rafters are located in a run, i.e. the upper connecting nodes of adjacent slopes should not converge in one place. The sprigs are attached to the sloping rafter leg with corners, to floor beams and extensions in a way that is more reasonable and convenient: corners or metal gear plates.

The hipped roof technology is based on already familiar hip principles. True, there is no ridge part of the truss system in their design. The construction begins with the installation of a central support, to which the sloping rafters are attached, and then the sprigs. If hanging technology is used in the construction of the roof with an envelope, then the finished truss truss is installed first.
We suggest you use our free online calculator for calculating building materials when installing a hip roof - and follow the instructions.
Helpful Video Instructions
Briefly with the sequence and rules for installing the truss system of a hipped roof of hip and hip categories, the video will acquaint you:
Having familiarized yourself with the specifics of the device and having mastered the intricacies of installing roofs with four slopes, you can safely proceed to the implementation of plans for its construction.
A four-slope truss roof is considered a rather complex structure. The construction of such a structure is recommended to be entrusted to experienced professionals who will help to correctly calculate the angle of inclination of the supporting beams and select the optimal weight of roofing materials.
This design has both advantages and disadvantages. Before choosing a similar roof for your home, it is recommended that you carefully consider the positive and negative sides of a hipped roof.

The main advantage of such a structure lies in the aesthetic appearance of a residential building. Thanks to this, the house acquires smooth and streamlined shapes.

Varieties of a hipped roof
There are several types of such a design. The standard structure is isosceles triangles that connect at a central point.

Beginning builders often confuse a hipped roof with an ordinary hipped roof. It consists of triangles, which in the top view form a regular square.

If the plan shows a rectangle, then we are dealing with a hip structure. She received this name as a result of the use of special slopes, which have the appearance of a tong - a hip.


The four-pitched roof is divided into the following types:
- Dutch;
- half hip Dutch;
- half hip Danish;
- tent.

The Dutch roof is distinguished by its resistance to climatic disasters. Two trapezoidal slopes are used here. The upper parts have long regular triangles, and the side ones are presented in the form of shortened corners.

In this case, a rafter system is used, in which four inclined beams are used with the required slope angle. The calculation of the hipped roof is based on the area of \u200b\u200bthe building.

Thanks to this, it is possible to correctly position the inclined beams and the distance between them.

A half-hip Dutch roof can be made as a gable or four-pitched roof truss. For the construction of such a structure, it is recommended to carefully select building materials.

Bearing supports should be made of dense wood species of trees. This variety is distinguished by its durability and endurance in relation to natural disasters.


Advantages and disadvantages
What are the advantages and disadvantages of a hipped roof? Experienced specialists highlight the following positive qualities of such a structure. These include:
- lack of gables. Thanks to this, it is possible to improve the aerodynamic performance of the roof;
- minimum angle of inclination of roof slopes. In this case, the hipped roof system allows you to adjust the length of the hanging logs. These elements help to make them an additional canopy for the veranda;
- aesthetic appearance of a residential building. The house acquires smooth and streamlined lines.

The disadvantages include the following reasons:
- complex installation. You can make such a roof yourself, if you have special skills;
- high consumption of building materials. To create a hip roof, it is necessary to make four slopes, which require additional marking and deformation of the roofing;
- construction of an attic space is required. If this requirement is neglected, then the risk of partial collapse of the erected structure increases.

Do-it-yourself four-pitched roof
How to make a hipped roof with your own hands? We bring to your attention detailed instructions that will help you properly build this design.

It includes:

Calculation of a hipped roof. This manipulation allows you to correctly calculate the amount of building material, the distance between the bearing logs and the angle of inclination of the roofing. The roof area will be slightly larger than the width of the ceiling span.

Drawings of a hipped roof. Here are detailed calculations and additional elements for attaching load-bearing logs.

Ceiling construction. To do this, use dense wood, which is fixed at a distance of 50 cm from each other. Next, lay a layer of waterproofing, which will prevent the appearance of mold and excessive humidity in the room.


Metal reinforcement is installed on concrete walls. Bearing beams will be attached to it in the future.

Now proceed to the construction of beam spans. They are fixed with metal corners and embedded anchors. When installing, it is important to observe the angle of inclination. For a classic Dutch roof, 45-50 degrees must be observed.

Next, we proceed to the manufacture of the attic space. It will be located in the center of the roof structure. To do this, make rectangles from a dense bar. For a roof with an area of 50 m2, 4-5 elements will be needed;

The frame of beams will rest on the upper boundaries of the rectangular structures. The beams should form a 45 degree angle at the top. All elements are fixed with anchors with plastic nozzles.

When the frame is completed, go to the roofing deck. Here you can use a metal profile, or soft tiles. The photo of the hipped roof shows the workflow.


Photo hipped roof