How to properly cover the roof with corrugated board with your own hands? How to cover the roof with corrugated board
If your home needs a roof that has an attractive and sophisticated look at a relatively low cost, a corrugated roof — cold rolled galvanized steel sheet with color resin coating is what you need.
Advantages of profiled steel sheet:
- excellent operational qualities: resistance to atmospheric factors, solar radiation, mechanical strength, resistance to corrosion,
- low specific gravity (from 5.5 to 9.5 kg / m 2), therefore, low load on the truss systems and the crate,
- roofing material can be selected according to the texture and color for the design of the building,
- relatively low price with high aesthetic qualities.
What kind of corrugated board is suitable for the roof
Any of the brands of corrugated board (universal, load-bearing or wall) is suitable for roofing, but laying thin wall material will require an almost continuous crate. For a regular crate with a step of 65-100 cm, it is preferable to use a more durable and rigid profiled sheet. The most commonly used material with such indicators:
- brand H or HC (carrying and universal),
- profiled sheet thickness from 0.5 to 0.7 mm (strong and light at the same time),
- corrugation height 20-75 mm (provides the possibility of elastic deformation of the roof),
- the presence of a capillary drainage groove,
- coating color that matches the existing or planned exterior of the house.
The price of corrugated board depends on several indicators of the material.
What you need to cover the roof with corrugated board with your own hands
It will not be difficult to cover a simple shed or gable roof of a country house, summer kitchen or garage on your own with one or two assistants and some skills in working with a screwdriver and a jigsaw. A broken gable roof of a house with an attic will also be able to work independently. Help with this video.
If the roof frame is of a more complex configuration, experienced specialists should be invited to cover the roof with corrugated board. The price of work will depend on the complexity of the roof and the area of \u200b\u200bthe slopes.
How much material is needed
It is not difficult to calculate the amount of material for a shed or gable roof, knowing the dimensions of the slopes. If the length of the slope is 12 m or less, you need to divide the width of the slope by the width of the material, the resulting number of sheets should be increased by 15%.
For more complex roofs, you can calculate the corrugated roofing online using special programs. Programs allow not only to determine the amount of material as accurately as possible, but also calculate the roof slope, overlap dimensions, and determine the best option for the location and fastening of the profiled sheet.
Tools and fasteners for work
For work, you will need measuring and cutting tools, fastening materials:
Features of laying a roof from a profiled sheet
It is best to do the work with four people, it will turn out much faster. Two people can also cope, but it is very difficult to work with long sheets of corrugated board alone.
- The minimum angle of the roof slope is 10 o. With a smaller slope angle, water can get under the material.
- The standard length of the profiled sheet is 12 m. If the length of the slope is less or more, the sheets will have to be cut.
- To protect the corrugated board from corrosion, waterproofing and vapor barrier should be made along the crate.
Installation of the crate under the profiled sheets
An important stage in the installation of corrugated roofing is the organization of hydro and vapor barrier to protect the metal from corrosion when water vapor enters.
They do this in two ways:
- laying a vapor barrier on the rafters under the crate and waterproofing (roofing material) on top of the crate under the corrugated board;
- organization of a ventilated roof, creating a ventilated space between the waterproofing layer and the roofing material. To do this, false rafters from bars are installed along the rafter legs along the waterproofing, a crate is made along them, a puff cake will turn out: rafters, waterproofing, false rafters, crate, profiled sheet.
Important! All elements of the crate must be impregnated on all sides with an antiseptic composition for wood. This will extend the life of the roof.
Lathing boards are laid in increments of 0.5-1.0 m, attaching them with nails or self-tapping screws to the rafters. The thicker and more durable corrugated board is used, the greater the distance between the boards of the crate. So, for example, for a profiled sheet of brand CH35, the crate step is 0.5-0.6 m, for CH44 - 0.65-0.75 m. The distance between the boards should not be more than 1 m.
Having made the crate, you need to check the diagonals of the slope and align the slope along the verticals, horizontals, diagonals. This will greatly facilitate the work of laying corrugated board on the crate.
The procedure for laying corrugated board with your own hands
- Profiled sheets are laid from the bottom up, starting along the slope from the end of the building, from left to right or right to left - it all depends on which side of the sheet the manufacturer made the capillary groove. When laying the material, the groove must be closed by the wave of the next sheet.
- The size of the overlap of profiled sheets horizontally and vertically depends on the angle of the roof slope. At small values of the angle of inclination of the slope, the sheets are laid with an overlap in two waves vertically, at high values - in one or half a wave.
- The horizontal overlap of the slope is at least 10 cm. The first row is laid with an overhang of 30-50 cm above the overhang (the distance depends on the design of the drainage system). The joints between the profiled sheets are sealed with a special tape. The sheet of the second row is laid with an offset along the end by half the width.
If 2 or more people are working, lifting the sheets is easy. They are laid on a frame of 5-6 bars in packs of 5-10 pieces and are pulled up with a rope along inclined boards attached to the crate.
On the crate so that the sheets do not roll down, one or two bars are nailed from below and a pack of coating sheets is placed. It is much more convenient to work this way than to serve one at a time, although this method is also used.
How to fix corrugated board on the roof correctly
Sheets are attached to the crate with self-tapping screws with washers and sealing gaskets. Their number is no more than 6-10 pieces per 1 sq.m. flooring. On the slope, the screws are screwed into the lower, and on the ridge - into the upper waves of the sheet.
If the material is thin, the screws are simply screwed in with a screwdriver, they easily pass through without damaging the coating. On thick steel sheets in the places where they are attached to the crate, it is advisable to pre-mark and drill holes for self-tapping screws with a drill.
Important! It is necessary to precisely align and correctly install the very first sheet, the quality of all work will depend on it.
The first sheet is first fixed in the middle with one screw and the overhang from the cornice and the vertical position of the crate are carefully aligned. After that, it is fixed with a second screw.
The material is attached to the upper and lower boards of the crate by screwing self-tapping screws into each deflection of the wave, into the central boards through the deflection.
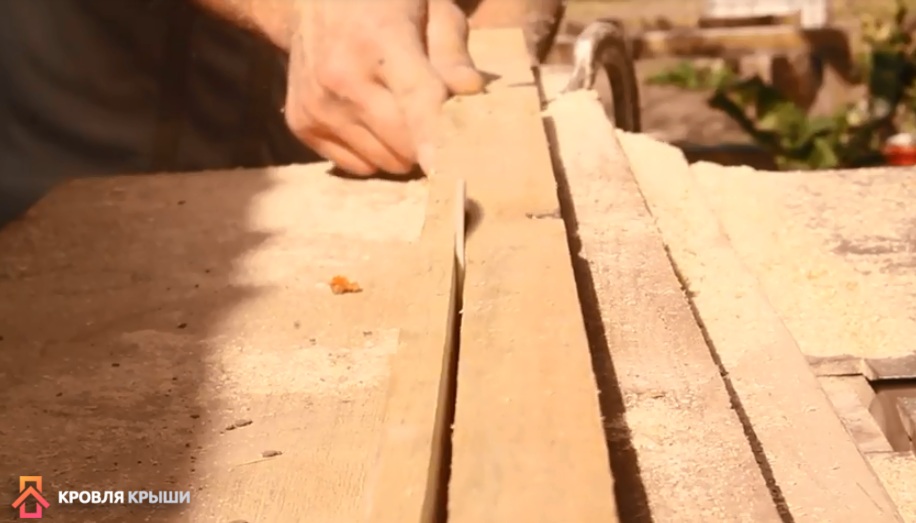
The second highest row is placed with the sheets shifted to the right or left by half the width. They cut the profiled sheet with an electric saw, a hacksaw for metal or an electric jigsaw with a metal file. They do it on the ground.
Attention! It is impossible to cut a profiled sheet with a grinder. This will destroy the polymer coating. For cutting, use scissors for metal, and paint over the cuts with paint.
Horizontal joints are also sealed with tape. Self-tapping screws on the overlap are screwed into each recess of the wave. The rubber sealing washer should protrude 1-2 mm around the perimeter of the screw head, this indicates that it is not pinched or loose.
Installation of the skate on the corrugated board
Ridge additional elements for corrugated roofing are produced
- simple in the form of a sheet bent at an angle with a shelf width of up to 30 cm,
- with a semi-circular edge
- with a U-shaped rib and shelves of the same dimensions.
To install a ridge on a corrugated roof, the last row of sheets should be aligned in the upper part along the end and laid in the same horizontal plane. The installation order is as follows:
- on the edge of the last row of sheets, a tape or a strip of ridge seal is laid,
- bars are fixed parallel to the axis of the ridge,
- ridge elements are screwed to the bars with screws into the upper corrugation after 20-30 cm, starting from the side where the wind most often blows,
On the modern market there is a huge range of building and finishing materials, including for the arrangement of the roof. Primitive finishes such as slate and bitumen are gradually fading into history, being replaced by more presentable and high-quality materials that fully meet the requirements of modern housing construction.
Corrugated board is one of such high-quality and aesthetic materials. You can handle the roofing with corrugated board with your own hands. You are provided with a guide to arrangement of flat roofs. Such roof structures are very often erected on various outbuildings such as sheds and gazebos, and sometimes over residential buildings.

An inexperienced person may decide that corrugated board is not the best suited for arranging a roof and can only be used for sheathing gates and fences. However, this opinion is absolutely wrong. Modern profiled sheets have excellent protective properties, excellent appearance and are available in the widest range of colors.
Add to all the advantages the ease of installation and fastening of sheets, as well as the affordable cost, and you get an almost perfect material for roofing.
It is for the ease of installation that private and thrifty developers love profiled metal sheets so much. However, you do not need to think that it is very easy to cover the roof with the material in question with your own hands. Here, as in any other work, there are a number of important nuances that must be taken into account, especially when working with flat roof structures.

The nuances of using corrugated board when working with a flat roof
Flat roofing is mainly used to cover various types of outbuildings. In the process of installing a profiled sheet on such a roof, a number of features must be taken into account, first of all, the low slope of the roof slope.
To cover a flat roof, you should use a single sheet, without joints. Any joints increase the risk of moisture penetration into the space under the roof. If it is not possible to equip the roof with one sheet, the joints must be sealed with special silicone products.
It is precisely because of the features mentioned above that corrugated board is very rarely used for roofing flat roofs. Roll materials are better suited for such structures, however, with a strong desire, corrugated board can also be successfully laid.

Technology Features
In accordance with the technology, profiled sheets must be laid at a certain angle, necessary to obtain the highest quality and reliable coating. If you have ever had to mount a roof covering with your own hands, you already know that the angle of attachment of the finishing material is determined by the angle of inclination of the roof slope.
In the case of a flat roof, certain difficulties may arise at this point. Profiled sheets are laid at a ten-degree angle. With a smaller slope, atmospheric moisture will not be able to drain normally from the roof and will penetrate under the roofing material, especially if the sheets are overlapped. In most cases, a crate helps to solve the problem of creating the desired slope in the case of a flat roof.

In addition to the slope of the slope, it is necessary to take into account its length. As a rule, profiled sheets have a standard length of 12 m. This size of sheets is very convenient - in most cases, the entire roof slope can be covered with one sheet, avoiding seams and any kind of joints.
If necessary, the profiled sheet can be easily cut with ordinary metal scissors. It is strongly not recommended to use a grinder for cutting roofing sheets. During the operation of this tool, a large amount of heat is generated, under the influence of which the protective coating of the corrugated board is destroyed, due to which the operational properties of the material deteriorate noticeably.
Roofing guide
With the device of a profiled sheet on a flat roof of a barn, gazebos and any other building, you can handle it yourself. The technology for performing the work remains almost the same for most cases.
Step one - tools
Prepare the following tools for work:
- electric drill. If possible, use a drill with a low chuck speed. This will allow you to accurately set the angle of entry of each fastener into the roofing surface;
- jigsaw. Instead, you can use scissors for working with metal or a hacksaw. It is categorically not recommended to cut sheets of roofing with a grinder. As a last resort, when no other tools are available, cut with a grinder using a special nozzle for processing corrugated board;
- brushes;
- boards for crates;
- hammer.
The second stage - crate

Start assembling the crate. To arrange this element, it is most convenient to use boards. Lay the boards on the rafters and fasten them with galvanized screws or nails every 50-100 cm.
Select the specific step of the crate in accordance with the characteristics of the profiled sheet used. For example, for the installation of C35 profiled sheets, the optimal sheathing step will be 0.5 m, and for sheets of the C44 brand, the fastening step of the boards must be increased to 70-75 cm.
If the length of the roof slope exceeds the length of the profiled sheet, lay additional boards at the future joints of the sheets.
Treat the finished crate with an antiseptic. You can perform such processing before the start of fastening the boards - as you prefer.
The third stage - moisture insulation

Profiled sheets are based on metal. Condensation inevitably settles on metal surfaces. Moisture sooner or later leads to irreversible damage to any building materials, so it must be neutralized. There are 2 main options for neutralizing the harmful effects of moisture, namely:

After the completion of the waterproofing work, you can begin to prepare directly for the installation of the roof. For more convenient lifting of sheets on the roof, you can make a simple fixture in the form of two long rails laid from the ground to the roof at a slight angle.
It is more convenient if you have three assistants, so that two feed the sheets from below, and two take the material at the top and perform its installation.

Fourth stage - laying sheets
First of all, choose the appropriate installation option for profiled sheets. In total, there are two main mounting options, namely:

Decking can only be fixed using special galvanized self-tapping screws with seals. The seal must be made of neoprene rubber. Such material tolerates contact with moisture and temperature extremes well. The optimal diameter of the self-tapping screw for fastening the profiled sheet is 4.8 mm.

Nails cannot be used to fix corrugated board. With constant gusts of wind, the nails simply cannot hold the sheets normally, as a result of which they will be torn off the crate.

Self-tapping screws are screwed into the cavities of the sheets, where the material is adjacent to the crate. About 6-8 self-tapping screws are consumed per square meter of coating. Try to place fasteners at the same distance. Sheets must be fastened to the extreme purlins in all waves, because. these places will be subject to the strongest wind loads. To the rest of the elements of the crate, the sheets can be fixed through one wave.

Mounting holes are best prepared in sheets in advance. When working with a thin profiled sheet, holes can be made using a self-tapping screw, but if the sheets are quite thick, make holes with a drill.

Self-tapping screws with multi-colored hats are currently available for sale. You can easily choose fasteners that exactly match the color of your roofing profiled sheets.

Lay adjacent sheets of coating with an overlap of 1 wave.
Cover the entire main surface with corrugated board, and then install additional accessories if necessary.

Thus, there is nothing complicated in self-covering the roof with corrugated board. It is enough just to follow the instructions and observe the precautions that are relevant for any roofing work.
Good luck!
Video - Cover the roof with corrugated board with your own hands
Every mistake made during the roofing will inevitably make itself felt in the future.Samplelemmascan beinsignificant, eliminatethemnotwill belabor, butmeetsvery rarely. More oftenTotalarisemedium and sometimes criticaldamageroofing system.Developersshouldunderstandthat to preventmistakesis lostmuchlesstime than forliquidationthemconsequences. This is not to mention the material side of things. The cost of repairs in some cases may exceed the cost of building a new roof, and this does not take into account possiblerepair damage to internalpremises.
The quality, durability and reliability of a corrugated roof depends on several factors:
- accuracy of compliance with recommended technologies, building codes and regulations. Only experienced roofers can make changes to generally accepted technologies and only to increase the stability of the truss system;

- experience and responsibility of roofers. It is impossible to take on complex work if even the simplest roofs were not covered in practice General recommendation - inexperienced developers can only cover the roofs of outbuildings and outbuildings with corrugated board. Residential is better not to deal with, these works should be done by professionals. No need to take an example from the heroes of numerous videos that describe the successful first experience of roofing. None of them publish the results of their work in 3–5 years, and for the most part they are very sad;

- quality and completeness of roofing materials. A very important factor that requires a careful approach. The fact is that you can spoil the roof from the most expensive metal profile for roofing, or you can make a very high-quality coating from cheap profiled sheets for wall decoration. There are several building secrets on how to save financial costs and at the same time increase the tightness and durability of the roof, we will talk about them a little below.

Important factors - the quality and completeness of roofing materials
The coating technology should take into account the features of the roof: the type of truss system, the purpose of the building, the type of attic space.
Prices for corrugated board
Decking
To make the right decision, you need to have objective information about profiled sheets and the impact of each characteristic on performance properties. All profiled sheets are conditionally divided into three large groups: for vertical structures (wall), universal (for walls and roofs) and roofing. This is a very conditional classification, if there is certain knowledge, then each type of corrugated board can be used for any of the above purposes.
| Sheets option | Impact on performance |
|---|---|
| The linear parameters of the sheets are regulated by the provisions of GOST 24045-94. For roofing sheets (H) and universal (NS) length for 3–12 m is a multiple of 250 mm. For wall (C) length 2.4–12 m multiple of 300 mm. Width 800–900 mm. The longer the sheet, the less overlap, the tighter the roof. But it must be borne in mind that it is quite difficult to work with very long profiled sheets due to their large windage. In addition, there are risks of sharp bends and fractures, and in these places anti-corrosion coatings are violated and oxidative processes are significantly accelerated. For the roof of the house, it is recommended to buy sheets no more than three meters long. Another advantage of long sheets is the minimization of material loss by reducing the number of overlaps. |
| The thickness of sheets for roofing (H) 0.6–1.0 mm, universal use (NS) 0.6–0.8 mm, and wall (C) 0.6–0.7 mm. The physical parameters of bending stability with the same thickness are corrected due to different types of profiles in height and width, the presence of additional elements to increase mechanical strength. Please note that standard sheet metal thicknesses cannot be less than 0.6mm. In fact, modern manufacturers produce profiled sheets with a thickness of 0.45 mm. In order to avoid problems, they write out special technical conditions for their substandard products, approve them in higher organizations and sell non-standard products to consumers quite officially on legal grounds. |
| The profile height of roofing sheets is 57–114mm, universal 35–44mm and wall sheets 10–21mm. You can immediately see the difference between the requirements of the standard and the actual technical parameters of profiled sheets. For some manufacturers, the profile height starts from a few millimeters. Why do manufacturers do this? The lower the profile height, the less the metal is deformed. This means that it is possible to degrade the quality of the metal (use cheap alloys), the thickness of galvanizing and paintwork. The small thickness of the metal and the height of the profile should be compensated by the truss system - reduce the step of the rails or make it solid. Experienced builders claim that such a roof will be much cheaper than buying thick and very high-quality roofing profiled sheets in all respects. |
| The highest quality sheets have modern aluminosilicon anti-corrosion coatings, electrolytic zinc protection is allowed. The mass of zinc on both sides must be at least 414 g, aluminum zinc must be at least 170 g. with each one square meter. Pay the most attention to this parameter. It is from him that 80% depends on the operating time of the roof. |
| The type and thickness of the paintwork is regulated by the provisions of GOST 30246, in some cases the parameters may change after agreement with consumers. The duration of operation depends on the quality of the paintwork by about 15%. We do not recommend choosing matte and rough paints. The fact is that dust accumulates faster on such surfaces, its rainwater does not completely wash it off. As a result, after a few years, mosses begin to grow on the roof, their roots penetrate the thickness of the paint and destroy it. Water enters the microcracks with all the negative consequences. |


Unfortunately, theseimportantdata cannot be obtained frommarkingssheets.It indicates only the literal conditional classdestination specification (C, HC, or H), profile height, useful width and thickness of the metal sheet.For instance,C15-800-0.6.Race Informationencrypted as follows- fromshade sheet withprofile height 15mm, usable width 800mm and thicknessmetal 0.6mm.

Roofing and wall corrugated board S-15 (useful width 1120 mm)
Other very important technical parameters haveon the certificates of conformity,Andx alwaysnecessarydemand fromseller.

An experienced roofer can roughly determine the thickness of the sheet by touch, sometimes micrometers are used for this.But this way you can find outbto the totalnno, but freezeindividually the thickness of the metal,cinca coatingI and a coat of paint canonlyin specializedlaboratoriesIX.As we mentioned above, it is these parameters that I provideTmain influence on qualitymaterialroofing, do not be shy to demand documents. If for some reason the sellers do not show the technical passport of the sheets, thenaboutbetter byAndfromkat othersthe shops.
Preparatory activities
The roofing process will be quick and successful if you prepare for it in advance. What should be done for this?
- Count the number of sheets. If the roof is an ordinary gable, then the calculation is simple. Find out the length and width of the slopes. The length must be increased by about 30 cm - the value of the overhang of the sheets. Calculate the area of the roof. Divide the resulting value by the effective width and length of the sheet, they are indicated in the material designations. A complex hip roof is divided into separate slopes, the area of \u200b\u200beach is calculated taking into account its geometry. Such roofs require an increased supply of sheets, in most cases it is 10% of the total area. The more complex the roof, the greater the amount of waste.
Important. If the calculation of the roof area is done in meters, then the area of \u200b\u200bthe sheet should be converted into the same units.
- Find out the number of metal end (wind), cornice and ridge slats. It must be remembered that each joint should overlap by about 10 cm and buy elements with a margin in length. For a complex roof, you need to have planks for valleys (internal and external).

- If there are square or round chimneys on the roof, then you should buy special elements for sealing joints at the junction.

Prices for roofing master flash
Roofing master flash
- Count the number of elements and decide on drainage system nomenclature. Some elements must be fixed before the sheets are installed, it is very difficult to do this after the roof is covered, in some cases it will be necessary to dismantle already fixed sheets. Any dismantling has negative consequences, you should remember this and plan your actions several steps ahead.

- When arranging a warm roof, you need to buy thermal insulation materials, steam and wind protection.

Of course, it is necessary to prepare the tools and make an audit of their technical condition.
List of required tools and fixtures
For work, you will need measuring tools and fixtures, metal scissors, a screwdriver, a hammer, a marker, a stapler. If you need to cut a large footage of sheets, then many roofers use grinders with metal discs.

Prices for popular models of angle grinders (grinders)
Angle grinders
You should not pay attention to warnings about the appearance of rust at the cut site, as incompetent "specialists" who have never done anything themselves write. Why?
- Firstly, the cut is never located in open space, it is always hidden under whole sheets or additional elements of the roof. It is dry and oxidizes very slowly.
- Secondly, working with a grinder is much faster and easier than with hand scissors. This is very important, especially if, due to the peculiarities of the roof, many sheets have to be cut.
- Thirdly, it is very inconvenient to cut with scissors - hands and handles rest against the metal, it bends, fingers hurt. It is especially difficult to work across or at an angle to the waves of the metal profile.
- Fourthly, the overlap of sections is at least 10 cm, even if it starts to rust, it takes several decades to damage such an area. This is much more than a guarantee of coverage.
- Fifth, if concerns remain, then the cut point can be covered with paint.
Step-by-step instructionpreparation for installationprofessional sheets
Consider the most difficult option for arranging the roof - warm.

If the width of the rafter legs is insufficient for insulation, then slats must be nailed to the rafters in such a way that not only the insulation layer is placed, but also between it and the wind protection there is at least 4–5 cm for ventilation.

Otherwise, the natural processes of getting rid of excess moisture will be disrupted, the mineral wool will become damp and lose its original heat-saving properties. But this is not all the negative consequences. Wet wool has an extremely negative effect on all nearby wooden structures of the truss system. If the lumber was not treated with antiseptics before the construction of the truss system began, then this mistake must be corrected.
Practical advice. The quality of impregnation is much improved if color is added to the solution. It allows you to detect gaps and eliminate imperfections.


First, you should make a warming cake, it consists of several layers.
Step 1. Nail the vapor barrier on the inside with a stapler, do not forget to overlap about 10 cm. The joints must be glued with double-sided tape. As a vapor barrier, you can use expensive modern materials or an ordinary cheap plastic film. The physical effect is the same, but the savings are tangible. The film has another advantage - large size. There are sleeves with a width of 3 m, if they are cut, it turns out 6 m.Such a wide material speeds up the installation process and minimizes the number of joints. The fewer joints, the more effective the protection of mineral wool from steam.


Step 2 Nail horizontal slats to the rafters. They will hold the mineral wool and provide natural ventilation between the roof and attic wall finishes.

Step 3 Lay mineral wool. You can use both rolled and pressed types. Each has its own styling features, but this does not affect performance.


Step 4 Nail the windscreen. You can find various names for this layer: hydroprotection, hydro-steam protection, membrane protection, etc. But the correct name is wind protection.


She performs two tasks.
The first one does not allow the weathering of warm air from the wool, otherwise the effectiveness of roof insulation decreases sharply. Minvata has many positive characteristics. Unfortunately, there are also three negative ones. The first is the cost, there's nothing to be done about it. The second is permeability. Mineral wool easily passes air and almost does not interfere with natural ventilation. And it carries away warm air into the atmosphere and supplies fresh cold air. The third is a negative reaction to an increase in relative humidity.
The second task of wind protection is to prevent an increase in the moisture content of cotton wool, with an increase in humidity, thermal conductivity increases dramatically. A modern membrane is used that allows steam to pass through, but does not allow the wind to remove warm air, and the condensate to drip back into the mineral wool.


Advice! To make it easier to fasten the boards, it is worth using a template - a piece of rail. The template is placed between two horizontal boards before fixing the top one.


On this, an insulating cake is made, you can nail the gable boards and start laying the roof.
Prices for windproof membranes
Hydro windproof membrane
YingfromTlaying guideprofessional sheets
The main thing here is to correctly lay the first row. In the future, all sheets are aligned to it. We have already said that the presence of markup greatly facilitates the process, do not be too lazy to do it.
Step 1. Attach the gutter fixing brackets. Before this, a metal bar should be installed, and the brackets should be screwed to it.

The tide can be made from sheet steel. Steel strip is bent with hammer blows

Finished plank (low tide)

Fixed metal bar
The slope is about a centimeter per linear meter. More is not recommended. Why? If you make a slope of 2 cm, then on a slope 10 m long, the difference in height will be 20 cm This is very bad - the gutter will be too low from the edge of the sheets, rainwater will flow past it. How to properly prepare the mount? Lay all the parts on a flat area, mark a difference of 10 cm between the first and last (for our example), draw a line at an angle through all the brackets.

Now it remains to carefully bend the metal bar along this line. In order not to confuse the brackets during installation, number the elements.


Step 2 Screw on the cornice strips. These are not only decorative elements, they protect the under-roof space from oblique rain and snow. Remember to overlap about 10 cm.

Important. The minimum dimensions for overlaps should be strictly maintained, due to this, the boards are protected from moisture. If the overlaps are insufficient, then water will enter the gap and wet the board. And it dries under the bar for a very long time, which increases the risk of fungal diseases and rot.
Step 3 Raise the first sheet onto the crate and accurately position it according to the marks.

Practical advice. In order to facilitate the installation of profiled sheets and make it safe, it is recommended to make a special ladder. It is fixed with two legs to the ridge and allows you to safely move along the slope to screw in the screws.
Start the screw in the center so that the sheet can be rotated slightly. Position selected - add a few more screws, but do not forget to leave free space to overlap the waves of the profiled sheet. You can start installation from any side, alignment is done along the eaves. For a guarantee, it is recommended to pull the thread along the line of the future installation of the gutter.

Step 4 Lift the second sheet of corrugated board, put it in place and check the position. If everything is normal, then you can fix both. Self-tapping screws should be screwed in a checkerboard pattern at the rate of 10 pcs. per 1m2.

Important. It is recommended to start the second row with half of the sheet, due to this, four corners will not converge at one point. This rule is mandatory for thick sheets, thin sheets can not be displaced. The decision is made by the master on the spot.
Self-tapping screws are screwed through a wave, if the thickness is about 0.8-1.0 m, then it is possible after two. But such thick profiled sheets are very rarely covered with roofs, they are too expensive. At the ridge and at the eaves, each deflection is fixed.

Practical advice. The work will be much easier if you fix the wind strips immediately after attaching the first row of sheets, and finish the skate as the worker moves along the slope. Moving on already installed profiled sheets is difficult and unsafe. In addition, there is a high probability of their mechanical damage.
Each chimney is finished, the sheets are cut. For sealing joints and decorative design, special metal strips are used.

All additional elements must be purchased simultaneously with the sheets and from the same manufacturer. This ensures that the ridge, wind and eaves strips all have the same appearance.


If everything is done slowly, responsibly and taking into account the recommendations, then the roof of profiled sheets will serve for a long time and reliably.
Video - Installation of corrugated board
Every craftsman with basic building skills, with a basic set of tools, can cover the roof with corrugated board with his own hands, even without much experience. Therefore, this type of roof is the most popular in private housing construction, as well as in the construction of outbuildings and outbuildings. Decking is inexpensive, and serves 25-50 years, making it a long-term leader among roofing materials in its price category. With the help of this affordable material, both a gable roof and more complex structures can be mounted. The technology of laying corrugated board on the roof is quite simple, we will talk about it in detail in this article.
Do-it-yourself corrugated roofing is a common design solution for a small private house, garage, shed or shed, which is popular among developers due to the excellent performance of the material. Decking is made from galvanized steel by cold rolling. During the manufacturing process, the surfaces are embossed to give greater horizontal rigidity and then cut into sheets of standard shape. The popularity of the profiled sheet is explained by the following factors:
- Efficient removal of water from the slope. Installation of corrugated board improves drainage from the roof surface, thanks to the gutters directed along the slope. Overlapping with corrugated board helps to solve the problem of snow and liquid retention on roofs with a small slope.
- Versatility. The instructions recommend installing a profiled sheet if the roof has a slope of 12 to 60 degrees. Almost all used roof structures fall into this range.
- A light weight. One square meter of profiled sheet weighs 5-7 kg, overlapping with this material does not increase the load on the rafter frame and the foundation of the structure.
- Resistance to mechanical influences. The corrugated board, due to the large number of vertical stiffeners, has high strength, it can withstand snow loads up to 1-1.5 m without deformation, as well as the weight of a person.
- Resistance to corrosion, fungus, mold and other biological factors of destruction. The installation of corrugated board solves the waterproofing problem, does not collapse under the influence of moisture, and serves for many years.
- Easy installation. You can cover the roof with a professional sheet yourself; any worker with basic building skills and a basic set of tools will cope with this task.
- Affordable price. A profiled sheet sheet costs 400-600 rubles, so covering the roof with this material will not cost so much.

Note! Before you cover the roof with corrugated board, you need to choose a high-quality, durable material. The profiled sheet is produced painted and unpainted. A paint or polymer coating that gives color to the material also performs a protective function: it prevents the penetration of moisture and the formation of corrosion. However, if the paint layer and galvanized coating are damaged, the corrugated board begins to rust quickly. The most reliable is considered to be a profiled sheet made of galvanized steel with a pural coating.
Design features
Novice craftsmen often do not know how to properly cover the roof with corrugated board, so they become a victim of lack of experience. Poor installation reduces the waterproofing qualities of the roof structure, reduces the life of the material, leading to the formation of corrosion or leaks. Decking can be laid on pitched roofs with a slope of 12 degrees. Experienced craftsmen can make a roof from this material, even if the slope has a smaller angle of inclination. The corrugated board is laid with a vertical overlap of 2 waves, and the vertical joints are treated with a silicone-based sealant.
Important! Before covering the roof with corrugated board, you can purchase material directly from the manufacturer, cut into sheets along the length of the slope. This allows installation with a minimum number of joints, which increases the service life and waterproofing qualities of the coating, as well as saves money by using less material.


Before you cover the roof with a professional sheet with your own hands, you need to study the technology of working with this material. Usually, manufacturers give detailed instructions describing the sequence in which installation should be performed. The corrugated roofing is a multi-layer cake, which, in addition to the finish coating, includes waterproofing and vapor barrier. Working with corrugated board has the following features:
- Before you cover the roof with corrugated board, you need to make a crate. If the distance between the rafter legs does not exceed 100 cm, you can use 30x100 mm bars. If the step exceeds 100 cm, the cross section of the crate bars must be increased.
- Before laying corrugated board, you need to make a crate. For this material, it is possible to lay a lattice crate with a step between the bars of 30 cm. In the places of valleys and ribs, a reinforced solid base is installed.
- Before starting the installation of the roofing, it is necessary to cover all the wooden elements of the truss frame with an antiseptic preparation, as well as to perform the treatment with a fire blocking composition.
Many homeowners do not know how to properly cover the roof with corrugated board, and therefore make annoying mistakes that affect the operation of the structure. A major defect is the absence of vapor barrier and waterproofing in the roofing pie. The corrugated board has a high thermal conductivity, which leads to the condensation of water vapor on the elements of the truss frame.
Profiled sheet laying technology
Most homeowners who want to cut construction costs do their own roofing but don't have a clear idea of how to properly roof deck. As a result of an unprofessional approach, the roof can leak, become covered with ice, the truss frame begins to rot and collapse. To avoid these negative consequences, it is necessary to strictly observe the technology of laying corrugated board. Instructions for the construction of a roof from this material is as follows:


Important! Profiled steel with a polymer protective coating deteriorates from thermal influences, therefore, a grinder or welding is not used to cut the material. Installation is carried out strictly in a cold way, and the sections are treated with a special primer that prevents the formation of corrosion.
Video instruction
On the modern market there is a huge range of building and finishing materials, including for the arrangement of the roof. Primitive finishes such as slate and bitumen are gradually fading into history, being replaced by more presentable and high-quality materials that fully meet the requirements of modern housing construction.
Cover the roof with corrugated board with your own hands
Corrugated board is one of such high-quality and aesthetic materials. You can handle the roofing with corrugated board with your own hands. We offer you a guide to the arrangement of flat roofs. Such roof structures are very often erected on various outbuildings such as sheds and gazebos, and sometimes over residential buildings.
The structure of the corrugated board
An inexperienced person may decide that corrugated board is not the best suited for arranging a roof and can only be used for sheathing gates and fences. However, this opinion is absolutely wrong. Modern profiled sheets have excellent protective properties, excellent appearance and are available in the widest range of colors.
Add to all the advantages the ease of installation and fastening of sheets, as well as the affordable cost, and you get an almost perfect material for roofing.
It is for the ease of installation that private and thrifty developers love profiled metal sheets so much. However, you do not need to think that it is very easy to cover the roof with the material in question with your own hands. Here, as in any other work, there are a number of important nuances that must be taken into account, especially when working with flat roof structures.
Colored corrugated board
The nuances of using corrugated board when working with a flat roof
Flat roofing is mainly used to cover various types of outbuildings. In the process of installing a profiled sheet on such a roof, a number of features must be taken into account, first of all, the low slope of the roof slope.
To cover a flat roof, you should use a single sheet, without joints. Any joints increase the risk of moisture penetration into the space under the roof. If it is not possible to equip the roof with one sheet, the joints must be sealed with special silicone products.
It is precisely because of the features mentioned above that corrugated board is very rarely used for roofing flat roofs. Roll materials are better suited for such structures, however, with a strong desire, corrugated board can also be successfully laid.
Types of corrugated board
Technology Features
In accordance with the technology, profiled sheets must be laid at a certain angle, necessary to obtain the highest quality and reliable coating. If you have ever had to mount a roof covering with your own hands, you already know that the angle of attachment of the finishing material is determined by the angle of inclination of the roof slope.
In the case of a flat roof, certain difficulties may arise at this point. Profiled sheets are laid at a ten-degree angle. With a smaller slope, atmospheric moisture will not be able to drain normally from the roof and will penetrate under the roofing material, especially if the sheets are overlapped. In most cases, a crate helps to solve the problem of creating the desired slope in the case of a flat roof.
Roofing cake for corrugated board
In addition to the slope of the slope, it is necessary to take into account its length. As a rule, profiled sheets have a standard length of 12 m. This size of sheets is very convenient - in most cases, the entire roof slope can be covered with one sheet, avoiding seams and any kind of joints.
If necessary, the profiled sheet can be easily cut with ordinary metal scissors. It is strongly not recommended to use a grinder for cutting roofing sheets. During the operation of this tool, a large amount of heat is generated, under the influence of which the protective coating of the corrugated board is destroyed, due to which the operational properties of the material deteriorate noticeably.
Roofing guide
With the device of a profiled sheet on a flat roof of a barn, gazebos and any other building, you can handle it yourself. The technology for performing the work remains almost the same for most cases.
First step - tools
Prepare the following tools for work:
- electric drill. If possible, use a drill with a low chuck speed. This will allow you to accurately set the angle of entry of each fastener into the roofing surface;
- jigsaw. Instead, you can use scissors for working with metal or a hacksaw. It is categorically not recommended to cut sheets of roofing with a grinder. As a last resort, when no other tools are available, cut with a grinder using a special nozzle for processing corrugated board;
- brushes;
- boards for crates;
- hammer.
The second stage - crate
crate
Start assembling the crate. To arrange this element, it is most convenient to use boards. Lay the boards on the rafters and fasten them with galvanized screws or nails every 50-100 cm.
Select the specific step of the crate in accordance with the characteristics of the profiled sheet used. For example, for the installation of C35 profiled sheets, the optimal sheathing step will be 0.5 m, and for sheets of the C44 brand, the fastening step of the boards must be increased to 70-75 cm.
If the length of the roof slope exceeds the length of the profiled sheet, lay additional boards at the future joints of the sheets.
Treat the finished crate with an antiseptic. You can perform such processing before the start of fastening the boards - as you prefer.
The third stage - moisture insulation
Roof waterproofing
Profiled sheets are based on metal. Condensation inevitably settles on metal surfaces. Moisture sooner or later leads to irreversible damage to any building materials, so it must be neutralized. There are 2 main options for neutralizing the harmful effects of moisture, namely:
- laying a vapor barrier membrane film on the crate from the side of the under-roof space and a waterproofing material, for example, a polyethylene film, on top of the roof insulation;
- creation of a ventilated layer. For this, a control crate is equipped. To create it, you need to nail perpendicular bars to the boards of the main crate. In this case, the "pie" will consist of rafters, battens, insulation, moisture insulation, control battens and corrugated board.
Roof waterproofing scheme from corrugated board
After the completion of moisture insulation work, you can begin to prepare directly for the installation of the roof. For more convenient lifting of sheets on the roof, you can make a simple fixture in the form of two long rails laid from the ground to the roof at a slight angle.
It is more convenient if you have three assistants, so that two feed the sheets from below, and two take the material at the top and perform its installation.
Lifting the corrugated board along the logs
Fourth stage - laying sheets
First of all, choose the appropriate installation option for profiled sheets. In total, there are two main mounting options, namely:
- vertical placement. The method is best suited for sheet material with a special drainage groove. First, a sheet of the starting row of cladding is placed on the roof and temporarily fixed. Then the laying of the profiled sheet of the second row is carried out, after - a new sheet of the starting row, followed by the next profiled sheet of the 2nd row. As a result, a block of four roofing sheets is created. The block is aligned and fixed. The rest of the sheets are fixed in a similar way;
Installation of a corrugated roof
- sheathing with blocks of three roofing sheets. This method is best suited for profiled sheets without gutters. First of all, 2 sheets of the starting row are placed on the roof, after which the starting profiled sheet of the next row is attached to them. The resulting block is aligned in accordance with the cornice and finally fixed to the crate.
Decking can only be fixed using special galvanized self-tapping screws with seals. The seal must be made of neoprene rubber. Such material tolerates contact with moisture and temperature extremes well. The optimal diameter of the self-tapping screw for fastening the profiled sheet is 4.8 mm.
Fastening sheets of corrugated board
Nails cannot be used to fix corrugated board. With constant gusts of wind, the nails simply cannot hold the sheets normally, as a result of which they will be torn off the crate.
Fastening of corrugated board
Self-tapping screws are screwed into the cavities of the sheets, where the material is adjacent to the crate. About 6-8 self-tapping screws are consumed per square meter of coating. Try to place fasteners at the same distance. Sheets must be fastened to the extreme purlins in all waves, because. these places will be subject to the strongest wind loads. To the rest of the elements of the crate, the sheets can be fixed through one wave.
Fastening of corrugated board
Mounting holes are best prepared in sheets in advance. When working with a thin profiled sheet, holes can be made using a self-tapping screw, but if the sheets are quite thick, make holes with a drill.
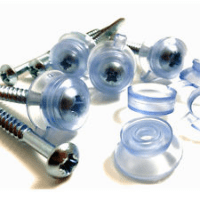
Self-tapping screws with sealant for installation of corrugated roofing
Self-tapping screws with multi-colored hats are currently available for sale. You can easily choose fasteners that exactly match the color of your roofing profiled sheets.
Installation of the end overhang assembly on the roof
Lay adjacent sheets of coating with an overlap of 1 wave.
Cover the entire main surface with corrugated board, and then install additional accessories if necessary.
Installation of corrugated board
Thus, there is nothing complicated in self-covering the roof with corrugated board. It is enough just to follow the instructions and observe the precautions that are relevant for any roofing work.
Video - Cover the roof with corrugated board with your own hands
Work with a professional flooring is convenient and simple. The thing is that it has a small weight, and the size of the sheet allows you to immediately cover a large area of \u200b\u200bthe roof. In addition, this material is soft, fastening is simple, so you can take on the equipment of the roof yourself. You don't need to be afraid. Two basic rules that will help in the work:
- follow the step by step guide;
- avoid possible mistakes, which we will discuss in detail in the article.
Working with corrugated board is relevant today, search engine sites are daily filled with thousands of new queries like “we cut the roof with a professional sheet”.
Material selection
Approaching the issue of choosing a roofing material, they initially sort out all possible options. There are a lot of them on the Russian market, and the advantages of each should be known to those who have come close to the issue of roofing. In this matter, it is important:
- material cost;
- its quality and durability;
- appearance.
Having decided to use corrugated board, remember that the material must be roofing, that is, have a groove for rapid precipitation. The brand also matters.
- C - wall;
- H - roofing;
- CH - universal.
Decking is a universal material, it is used everywhere. Due to the growing popularity and the number of sales, manufacturers are releasing new items in bright colors and interesting designs. The advantages of using it as a roofing material are obvious:
- ease;
- the presence of protection against corrosion;
- affordable price;
- ease of installation;
- roof waterproofing.
A roof covered with corrugated board can leak only if there is serious mechanical damage, for example, as a result of a heavy tree branch falling. In general, the durability of the coating is one of the most favorite qualities.
A sheet of corrugated board consists of several layers that provide its protection:
- zinc coating;
- anti-corrosion layer;
- ground cover;
- polymer coating.
A protective film is also applied on top, which is removed after installation. An overview of the various brands of corrugated board that can be used for the roof is shown in the video.
Self-assembly
A detailed description of the self-laying of corrugated roofing on the roof will help any beginner to cope with the task. For a standard gable roof of a house measuring 10 by 12 meters, two people will cope with the task in two days. This will save money and give you some experience that will come in handy later.
When transporting, loading and unloading, be careful. If the sheet is damaged, it will need to be replaced, which entails additional costs. Curves cannot be corrected. When lifting corrugated board to the roof, logs are used. You need to lift one sheet at a time.
You can walk on the laid sheets of the roof, but you need to do it carefully: step only on places under which there is a crate in shoes with soft soles.
Preparatory process
For those who have just started the process of lifting the roof, below is a short video for your reference. We will start with the fact that for fastening you will need to make a crate. Pre-create thermal insulation and cover the roof with waterproofing material.
The work is done in this way:
- vapor barrier material is laid under the rafter;
- in case of severe frosts, a heater is laid in the region;
- waterproofing material is laid on the rafter;
- install a counter-lattice and a crate.
All this is called "roofing cake". To the first board of the crate along the edge of the roof, it will be necessary to fix the cornice strip, along which water will flow.
The crate and the counter-crate are mandatory elements. Before laying them out, you need to treat them with a special solution against wood decay. The presence of insulating materials will further reduce heat loss through the roof.
Necessary materials
It is necessary to prepare tools and materials in advance, so as not to be distracted by trifles later. So let's make a list:
- sheets of corrugated board (it is best to use sheets with a length equal to the slope of the roof, as stated in the first introductory video);
- logs (serve to lift roofing material to the roof);
- roofing screws for fastening;
- portable screwdriver;
- gloves.
Sheets of corrugated board are calculated and cut on the ground. Upstairs they are delivered already for fasteners. Treat the cut points with an anti-corrosion primer. As for self-tapping screws, it is better to use special ones, since they are equipped with a rubber seal that does not allow moisture to flow under it. Also, the convenience of their use lies in the fact that you do not need to pre-drill a hole, and the caps are painted in different colors in the color of the corrugated board. The consumption of self-tapping screws with a running size of 4.8 * 28 mm is 6-7 pieces per 1 m2 of material.
Advice! Use a cordless screwdriver, it is not heavy and does not require additional pulling of the extension cord.
Safety regulations
Compliance with safety rules is also important, because working at height is associated with a number of difficulties and dangers. Adhere to the following rules:
- it is forbidden to cover the roof with corrugated board in windy weather;
- be sure to use thick gloves to avoid cuts by the material;
- for ascent and descent use a ladder fixed in two places;
- work without insurance on the roof is prohibited;
- if it starts to rain, all work is stopped until the roof is completely dry;
- when moving along fixed sheets, the leg is placed in the groove;
- After work, remove all debris and tools.
If you follow this list of rules, you will be able to avoid injuries, which, unfortunately, often occur when working with beginners.
Features of laying corrugated board
Installation work begins with the installation of a cornice strip. It is often forgotten about. When installing corrugated board, the angle of inclination of the roof is taken into account in advance. If it does not reach 15 degrees, the corrugated board is overlapped by 20 centimeters. An angle up to 30 degrees allows you to overlap by 15 centimeters, and for an angle above 30 degrees you can reduce it to 10 centimeters. Keep in mind that the minimum overlay size can be considered the size of one wave, which is convenient to work with.
You can start work both on the right and on the left. For hip roofs, work begins from the middle of the hip.
Work process
Carefully lift the sheets onto the roof, stack them and align. The video "Roofing the Garden" shows the process of roofing.
The fastening of the corrugated board with the crate must be carried out in the groove, and not at the top of the wave, it is then that the fasteners will be reliable. From the bottom we go up to the skate. In this place of the roof you need to use self-tapping screws of great length. As a rule, it is 80 millimeters.
If the length of the slope is very large, and it is impossible to cover the roof in one sheet, you will have to work with a smaller corrugated board. At the same time, it is laid from the bottom up with an overlap. This prevents moisture from getting under it.
End strips and ridge elements are mounted after all work is completed. Previously, a small gap is left in the area of \u200b\u200bthe ridge, which is needed for ventilation. Despite the fact that there are a lot of photos and videos on the Internet with details of working with corrugated board, beginners often make mistakes during installation.
The most common mistakes
Some of the errors are presented in the video below, they relate to the sequence of installation of corrugated board joints.
In addition, mistakes are often made when working with corrugated board in the area of valleys, ridges and pipes. Beginners cut and bend metal in special shapes, although this is not necessary. Manufacturers specifically produce overhead elements from this material to facilitate the task.
You don’t need to invent something, it’s easier to buy a finished element from corrugated board and fix it to the roof, which will be reliable. Otherwise, there is a risk of leakage and rust formation over time. Fasteners must be overlapped. To the attention of those whose roof is equipped with chimney pipes: an additional chimney is installed on the pipe (you can choose a color).
Roofing work with corrugated board is simple, it is quite possible to do it yourself. The most important thing is to follow the instructions and observe safety precautions. Then your roof will be one of the most beautiful!
How to properly cover the roof with corrugated board with your own hands video
First, the truss system is mounted, given the fact that the roof will be covered with profiled metal. For each brand of a profile sheet, it is necessary to calculate the distance between the rafters and a specific type of crate.
When choosing a corrugated board, first of all, you need to remember the peculiarities of the climate of the region where you live. In areas with heavy snowfalls, it would be more appropriate to choose a material with a wave height of up to 20 millimeters. The angle of the roof slope during construction should be more than 15 degrees.
How to calculate the number of sheets of corrugated roofing
The calculation of the amount of required profiled sheet depends on the angle of the slope. It also takes into account the likelihood that the profile sheet will be laid when overlapping both horizontally and vertically. In addition, it must be taken into account that the optimal sheet length should be four centimeters longer than the total and that the flooring should protrude beyond the cornice line. And to be completely sure when calculating, it is necessary to determine the diagonal dimensions.
Professional subtleties that need to be considered when installing corrugated board:
To protect the upper strip of the roof fracture, a ridge bar is attached.
The end plate is necessary to protect the outer profiled sheet. It is fixed with an overlap or in size.
The first wave of the profiled sheet is closed with a bar measuring more than five centimeters.
To protect the roof and facade, a cornice strip is installed, which is fixed with screws every 30 centimeters with an overlap of 10 cm.
On the inside of the joint, a valley is fixed with self-tapping screws at a distance of 20-30 centimeters in the depth of the wave.
The edge of the joint sheet must be well fixed. She is under the skate.
At the junction of the wall and roof, an adjoining bar is laid.
To the chimney, if any, an apron is made from a sheet of metal that matches the color of the roofing material.
The method of laying corrugated board with your own hands
The key to the quality of the roof will be the competent laying of sheets. It all depends on the angle of the roof:
With a roof slope of 14 degrees, the sheets are overlapped by 20 centimeters or a little more.
If the angle of inclination is from 15 to 30 degrees, the sheets can be laid with less overlap.
If the angle is steeper than 30 degrees, the overlap can be 10 or 15 centimeters.
with a sloping roof, where the angle of inclination does not exceed 12 degrees, horizontal and vertical seams are sealed with sealant.
The overhang of the eaves depends directly on the height of the flooring.
In order to cover the roof with a profile sheet, it is necessary to purchase galvanized self-tapping screws equipped with a rubber sealing washer. Their number should be based on approximately 1 square meter of 5-7 pieces. Self-tapping screws are attached at the bottom of the sheet wave. And on the skate, they twist on the upper section of the corrugation. A long self-tapping screw is attached at this point.
At the bottom, the profiled sheet is fastened at the very edge of the wave. Then, after one rise, in a checkerboard pattern, it is twisted along a self-tapping screw. Where overlap occurs, the sheets are attached to the crest of the wave. At longitudinal joints, the fastening distance of the profiled sheet should be 50 centimeters.
There are two ways to properly cover the roof with corrugated board
Method 1. First, the first sheet is laid from the bottom row, after which the second sheet is superimposed on top of it. Then the second sheet of corrugated board in the bottom row, and again the sheet is placed on top. It turns out a certain layer of four sheets, then a second layer is created in the same way, and so on. This method is suitable for profiled sheets with a deep drainage groove.
Method 2. In this case, a layer of three sheets is made. First, two sheets are laid at the bottom and one at the top. The edge must be aligned with the eaves. After fixing the layer, the rest are attached to it. This method is convenient to use in the absence of a drainage groove. Sheets laid in the lower rows are laid with a profiled sheet from above.
How to cover the roof with corrugated board: cut correctly
It is possible to qualitatively cover the roof with corrugated board even in the absence of professional construction skills. It is only important to follow the technology of work and try to avoid common mistakes that can affect the result.

The choice of corrugated board
The advantages of this material are obvious :
- light weight: covering the roof with corrugated board does not require strengthening the existing truss system, building structures and foundation
- a reasonable ratio of cost and durability of the material: with proper installation, the roof can last more than 15 years
- aesthetics: corrugated board with a polymeric color coating allows you to create an attractive-looking roof
- practicality: simple galvanized sheets are an inexpensive solution for industrial buildings and outbuildings.
It is extremely important to choose a material with the necessary strength characteristics. In addition, it must be taken into account that corrugated board with a capillary groove should be used as a roofing material, which contributes to the effective removal of rainwater when the sheets are overlapped. It is not recommended to save on material - for a cheap profiled sheet made of low-quality steel, the capillary groove is easily deformed under loads and becomes useless. Such a roof cannot be cleaned of snow in the winter without damage or repaired if necessary.

Galvanized sheet is the cheapest option for roofing, but it cannot be called attractive. Professional flooring with a protective and decorative polymer coating is in high demand. It is important to determine the requirements for the strength and wear resistance of this coating. If a corrugated sheet is to be used on a roof with a high angle of inclination, then polyester-coated material can be used, since snow rolls off from such a roof under its own weight and the risk of damage to the coating during cleaning is reduced. For roofs with a lower angle of inclination, it is recommended to purchase corrugated board with a much stronger outer layer of pural or PVDF (polyvinyl difluoride), but in this case, covering the roof with corrugated board will cost more.

How to avoid material damage during shipping
Profiled sheeting, made of steel sheet by cold profiling, as a roof covering has the necessary strength and the ability to withstand high snow and wind loads. But the sheets, individually, are largely subject to mechanical damage.
Transportation and lifting of material to the installation site should be carried out taking certain precautions to prevent accidental damage to the corrugated board.
Before covering the roof with corrugated board, the material should be delivered to the site. In this case, certain transport rules must be observed. Deformation of the roofing material during loading and unloading operations or transportation will lead to the need to replace it and, as a result, to an increase in the cost of the roof. To make a reliable roof covering, you should use a profiled sheet with a thickness of 0.5 mm or more, made of high-quality steel.
Basic transportation rules :
- Such material is transported in piles laid on a solid, solid base, for example, on wooden logs, and the length of the log must exceed the width of the sheet.
- When preparing for transportation, the load placed in the machine must be securely fastened with slings in order to avoid friction between the sheets and against neighboring objects - this can lead to damage to the protective coating.
- The recommended speed of the vehicle when transporting corrugated board is no more than 80 kilometers per hour.
If the loading of profiled sheets at the place of purchase is usually carried out by professionals using special equipment, then unloading at the facility is often done manually on their own. To properly cover the roof with corrugated board, you should carefully transfer the sheets one at a time. It is advisable to carry each sheet together.
It is strictly forbidden to bend the corrugated board or drag the sheets! It is almost impossible for a deformed sheet to return to its original geometry, and it becomes unsuitable for mounting. Damage to the protective and decorative layer leads to a rapid onset of the corrosion process during the operation of the roofing.
The rise of the corrugated board to the roof should also be done correctly. The technology of work is as follows :
- do not lift the material in windy weather - this may damage it
- from the ground to the roof, it is recommended to stretch the logs along which to lift the sheets
- You can lift the corrugated board only one sheet at a time.

Considering how to properly cover the roof with corrugated board, it can be noted that two people can quickly and efficiently perform work. At the same time, lifting material to the roof is much more convenient and easier to carry out by three people. With the technology of work on the installation of the coating can be found on the thematic video.
How to avoid material damage during installation?
How to properly cover the roof with corrugated board? If you have to mount the roof of a sufficiently large area, that is, in the process of attaching the sheets you will have to walk on the already laid material, first of all you should take care of the shoes. It is required to wear shoes with soft soles that will not slip on the metal and will not damage its protective polymer layer. You can step on the roofing material only in those places where the sheet lies on the crate.
If we cover the roof with corrugated board, then you should choose the right tool for installation work. Laying this roofing material does not require the use of complex expensive equipment. It is enough to have:
- screwdriver
- metal shears capable of cutting steel up to 0.6 mm thick
- hacksaw with fine teeth
- electric scissors or electric jigsaw.
 It is not recommended to use electric welding or gas welding when installing corrugated board, as in this case there is a high probability of damage to the protective coating of the sheets.
To avoid corrosion at the cut points of corrugated board sheets, it is advisable to immediately treat the ends of the material with an anti-corrosion primer.
Features of fastening corrugated board
In the question of how to cover the roof with corrugated board, special attention is paid to fasteners. To securely attach the sheets to the crate, it is best to use galvanized self-tapping screws with a drill at the end. The size of the fasteners is 4.8#215 35 mm. Each self-tapping screw must be equipped with a special neoprene gasket that protects the attachment point from moisture. Self-tapping screws must be screwed into the wave in its lower part, adjacent to the crate. When fastening the ridge, the self-tapping screw is screwed through the top of the wave. Manufacturers of corrugated board often offer self-tapping screws with hats painted in the color of the selected roofing material, which increases the aesthetics of the finished roof.

When installing polymer-coated corrugated board, it is especially important to ensure that the chips generated when screwing in fasteners do not damage the outer protective layer of the material. The chip must be carefully removed immediately. If it is left in place, it will quickly begin to rust, and serve as a source of corrosion, in addition, the presence of protruding chips will prevent the neoprene gasket from sealing the place of attachment.
 It is impossible to fasten the corrugated board to the crate using aluminum rivets or nails! This type of fastener cannot provide the necessary resistance of the roofing to strong wind loads.
Considering how to cover the roof with corrugated board, it can be noted that the strength and durability of the roofing largely depend on the correctly chosen lathing pitch, sufficient vertical and horizontal overlap of sheet material, the use of special strips that protect the ends of the roofing from atmospheric influences and a number of other factors.
The main stages of installation of corrugated roofing are described in detail in the video material.
How to cover the roof with corrugated board?
Metal profiled sheet is quite popular among professional builders and architects, as well as among individual developers. The corrugated board, obtained from thin sheet steel by cold rolling, has a high bearing capacity and easily withstands even very large wind and snow loads. With proper installation, the roof covering with a corrugated sheet with an anti-corrosion coating is very reliable - such a roof will last 20-25 years without any operating costs.
An important advantage of corrugated board is the possibility of manufacturing sheets of great length. With a roof slope length of up to 12 m, the roof can be covered with corrugated board in one row without transverse joints. And any additional joint increases the likelihood of a violation of the tightness of the roofing.
House with a profiled roof
Due to its light weight, corrugated roofing is often used when replacing old, worn-out roofing, since it is not necessary to reinforce the existing truss system under the corrugated board. Among other things, thanks to modern colored decorative coatings, the metal profiled sheet looks very attractive.
The small weight of the profiled sheet also allows you to cover the roof with corrugated board with your own hands without the involvement of builders. In addition, information on how to properly cover the roof with a profiled sheet is publicly available, and the process itself does not require many years of experience, special education and skills.
Below we will focus on the main features of the installation of this roofing material, which you need to get acquainted with before covering the roof with corrugated board.
Which profiled sheet to choose for roofing?
Before we dwell on how to properly cover the roof with corrugated board, let's briefly dwell on the rules for choosing a profiled sheet for the roof. Today, both wall corrugated board of grade C, intended for the manufacture of sandwich panels, cladding of building facades and the construction of various fences, and a special profiled sheet for mounting roofing are widespread.
Many are interested in whether it is possible to cover the roof with grade C corrugated board, which is several times cheaper than the bearing profiled sheet. On the whole, this question can be answered positively. However, the height of the trapezoid or profile wave must be at least 20 mm. For steep roofs of small buildings, you can even use C10 corrugated board, but under it you need to make a continuous crate.
Roof sheeting with capillary groove
However, the use of wall corrugated board, although economical, is not reliable enough. Since you are interested in exactly how to properly cover the roof with a profiled sheet, and not in the ability to save on the reliability and quality of the roof, I strongly recommend using a roofing profiled sheet. Especially if the building is being built in a region with high rainfall and high snow cover.
It differs from the wall one in that the width of the profile shelf is greater than the width of its crest. This facilitates the removal of water and snow from the roofing. In addition, corrugated roofing sheets often have additional stiffening ribs and a capillary groove along the edge of the sheet.
These design features increase the longitudinal rigidity of the profile and contribute to the removal of moisture that has fallen between the sheets of the roofing.
Having chosen a profiled sheet, you can start covering the roof with corrugated board.
How to start roofing with corrugated board?
To prevent accidental damage to the material, the transport and lifting of corrugated roofing must be carried out with the utmost precautions. Indeed, in case of deformation, it is almost impossible to return the original geometry to the profiled sheet. In addition, even the most minor damage to the protective coating can lead to premature corrosion of the corrugated board and reduce the life of the roofing.
If you purchased a profiled sheet in advance, then remember that you can store it in its original packaging for no more than a month. At the same time, it should lie horizontally on linings, with a height of at least 100 mm. If it is supposed to store the corrugated board for more than a month, wooden slats are laid between the individual sheets.
Before covering the roof with a profiled sheet, it is necessary to make ventilation gaps under the surface of the roofing with the help of bars of the counter-lattice. Properly performed ventilation prevents the accumulation of condensate on the inner surface of the roofing. The size of the ventilation gap should be 40-50 mm. To protect the under-roof space from drops of condensate, a waterproofing membrane is laid on the rafters, on top of which a counter-lattice is mounted.
Roof prepared for covering with corrugated board: sheathing is made, gable and cornice strips are installed
Strictly following the installation technology, two or three people can cover the roof with corrugated board with their own hands without special skills.
We begin the installation with the installation of a device for lifting corrugated board on the roof. We lift the profiled sheet from the ground to the roof along wooden logs, and only one sheet at a time.
The procedure for further work with corrugated board largely depends on the angle of the roof. Although, in theory, profiled sheet can be used even for roofs with slopes of 2-3, it is better that the roof slope exceeds 10-12. In this case, we cover the roof with corrugated board with an overlap in just one wave. If the installation of a profiled sheet on a roof slope is carried out in several rows, the overlap between the rows should be from 100 to 200 mm, also depending on the angle of the roof.
Fitting corrugated sheets before roofing
Before you cover the roof of the house with corrugated board, you need to fit the coating sheets. For cutting sheets of corrugated board, it is ideal to use electric shears for metal, which accurately, evenly, without nicks and extra effort, allow you to make the desired cut. However, since we cover the roof with corrugated board with our own hands, therefore, there is no specialized tool, you can use both an electric jigsaw and a hand saw with fine teeth. To prevent edge corrosion, the edges of the cuts must be treated with anti-corrosion mastic.
It is strictly forbidden to use high-speed power tools with abrasive wheels for cutting corrugated board. Hot abrasive particles can seriously damage the polymeric protective coating of the profiled sheet.
How to properly cover the roof with corrugated board - cutting profiled sheet
In order to cover the roof with corrugated board with your own hands, you must also follow a few simple rules that will help you avoid injury during the work:
- you need to work in soft shoes that will not damage the polymer coating and, at the same time, will not slip on its surface
- it is not recommended to work in windy weather due to the high windage of corrugated sheets
- it is also impossible to work in the rain, since the wet surface of the profiled sheet is very slippery and it is very difficult to stay on it even with a slight slope of the roof
- several sheets must not be lifted onto the roof at the same time, since if one of them slips off, serious injury can occur.
After laying out and fitting the profiled sheet, proceed to its fastening. Special attention should be paid to how to properly and securely fix the corrugated board.
How to properly cover the roof with corrugated board?
It is impossible to fasten a profiled sheet with nails, since such fasteners will gradually weaken under the influence of wind loads. Subsequently, this will lead to deformation of the profiled sheet and a violation of the tightness of the roof. Therefore, before you cover the roof with a profiled sheet, you need to purchase special roofing screws.
Roofing screws usually have a hex head with a press washer. The tip in the form of a drill makes it possible to fasten the corrugated board with roofing screws not only to a wooden, but also to a metal crate, and without pre-drilling holes.
Roofing screws with a cap matching the color of the corrugated board
The hex head allows you to tightly and securely press the profiled sheet to the crate using a screwdriver or an electric drill with adjustable rotation speed. Of particular importance are the sealing gaskets of roofing screws, made of special neoprene rubber.
In order to tightly press the corrugated board to the crate, the fastening is carried out through the bottom wave of the profile. But it is in this way that all the water from rain and snow melt flows from the roofing. Therefore, when we cover the roof with a profiled sheet, it is very important to ensure the tightness of the fastening points of the profiled sheet. The neoprene rubber of the protective pad self-vulcanizes when the roofing screw is tightened, completely eliminating the possibility of moisture penetrating under the roof. Self-tapping screws are screwed through the upper wave only when the ridge is installed.
Horizontally, the corrugated board is fixed to the crate through one wave. Vertically, self-tapping screws are installed through one board of the crate in a checkerboard pattern. On the gable overhang, fastening is carried out to each board of the crate. On the cornice overhang, self-tapping screws are screwed into each wave of the profile.
Fastening profiled sheet to the crate
In each wave, the corrugated board is also attached in places of overlap between adjacent rows of coating. Cover sheets in places of longitudinal overlaps are recommended to be additionally fastened with special rivets.
When screwing self-tapping screws or drilling holes in the roofing, small metal chips are formed. Before the final tightening of the screws, it must be removed to avoid damage to the polymer protective coating. In addition, these shavings can interfere with a snug fit of the neoprene pad.
Proper tightening of roofing screws
Before you cover the roof with corrugated board yourself, you need, just in case, to purchase a can of repair paint. It is better to immediately tint the protective coating in places of minor damage than to repair the roof in a few years.
Installation of additional elements
Any roof, in addition to laying the material itself, provides for the installation of special additional elements. And if everyone knows about the need for a skate, then the importance of the remaining elements is no longer so obvious. These include various junction planks, valleys, as well as details of gable and eaves overhangs. All these elements have not only a decorative purpose. They protect the edges of the corrugated sheet roofing from water leakage and undermining by strong gusts of wind.
If you are interested in how to properly cover the roof with corrugated board, then installing additional elements is one of the most important steps. Especially considering that many of them must be mounted before laying the main coating.
The most difficult in the execution of the valley roofs made of corrugated board. This is the name of the junction of the roof slopes, forming an internal corner. This is an almost indispensable element of any complex mansard roof. Since it is in this place that water flows from both slopes, it is very important to ensure the tightness of the roof in the valley area.
The device of the valley on the roof of corrugated board
Before covering the mansard roof with corrugated board, mark the locations of the valleys and install the lower valley strips in them. The crate under the bottom bar of the valley is made solid. Only after checking the reliability of the installation of these elements is the installation of the roofing.
It is very important to know how to cover the roof with a profiled sheet in the area of \u200b\u200bthe ridge. It is at the upper junction of the roof slopes that the air from the ventilation gaps should come out. Therefore, in the upper part of the roof between the roofing of the slopes, a gap is left, which is covered with ridge elements.
Start the installation of the ridge from the side that is opposite to the prevailing wind direction for the area. The elements of the ridge are fastened with an overlap of 100-150 mm with roofing screws through the upper wave or trapezium of the corrugated board.
Step-by-step instructions for laying corrugated roofing: from waterproofing to ridge and cost. Tips on the order of laying the profiled sheet on the roof, on the installation of cornice strips and fastening the sheets to the crate. Pricing for corrugated roofing
What is the cost of a corrugated roof? What is the cost of a profiled sheet roof? Why is it more profitable than most classic roofing materials? Answers - read the article. Roof decking
Roof decking - benefits of use, types and most suitable brands of roof decking. Specialized profiled sheet for roofing with capillary grooves.
The site oprofnastile.ru - up-to-date and useful information about corrugated board, its installation and use, professional advice and step-by-step instructions for you.
Sources:
Construction and repair
The roof can be covered with any roofing material: slate, tiles, ondulin, corrugated board.
If for example cover only intentionally trained craftsmen can do roofing with tiles, then even a beginner can lay a profiled sheet on the roof frame.
Professional sheet is a unique repair and roofing material, which is made in the form of coated steel sheets.
Roofing for corrugated boarding must be even.
In addition, before laying a profiled sheet on the roof, it must be waterproofed with various types of materials for insulating work. waterproofing and insulation of the roof under the profiled sheet is done in the same way as for roofs made of other materials.
If, for example, there is a dwelling under the roof of profiled flooring, then waterproofing and insulation is carried out in the form of a multi-layered “pie”.
In order to protect the unusual roofing "pie" from dampness and mold fungi, excellent air circulation is needed, for which the roof lathing is built.
There are a lot of tips and secrets on how to properly cover the roof with corrugated board, but if, for example, you choose the wrong material for the roof and make calculations, the roof can turn out to be unreliable.
And therefore, first of all, we make calculations, select the material correctly, and after that, according to the methodology, we will begin to cover the roof with corrugated board.
It all depends on the purpose and strength of the sheets of profiled flooring are marked with specialized icons that classify the pitch and waveform of the profile, and plus the slope range.
The designation of the slope is read as follows: the greater the slope of the roof, the lower the profile grade. Plus, the installation step and the calculated load of the crate bars depend on the profile brand - the higher the profile brand, the less often the bars are installed.
Almost the entire range of profiled flooring is equipped with convex or grooves and concave stiffeners to drain unwanted water.
Coating of profiled sheets can be galvanized or polymeric. Both coatings not only perfectly protect the metal sheets of the profiled flooring from rust and the adverse effects of the sun's rays, but also hold every load, even the most significant.
True, both types of coatings are in no way inferior to each other, the polymer-based profiled sheet has a wide palette of colors, which allows you to easily and cheaply create an individual design for absolutely any roof.
The length, width and thickness of the profiled sheets is chosen personally. When deciding whether it is possible to cover the roof with corrugated board smaller than the size of the leaves, remember that the length of the sheet must completely cover the overhang and slope of the roof, only such a coating will be considered excellent.
For the roof sheathing, you should take specialized reliable girders or planks of 32 x one hundred millimeters. When the profiled sheet is selected and purchased in the right quantity, we proceed to install the roof with our own hands.
How to cover the roof with corrugated board with your own hands?
For laying profiled sheets, you will need many tools, plus technology safety precautions and strict adherence to installation.
Tools for installing roofing sheets will need the following:
- scissors for cutting metal;
- electric drill and screwdriver;
- hammer and wire cutters;
- sealant revolver and staple revolver;
- marker, measuring tool, template for crates;
- cord and rivet pliers.
For cutting roofing sheets, you can not use a grinder, based on the fact that it is very scary. The profiled sheet is cut only with scissors: thick leaves are cut with lever scissors, thin ones - with slotted ones.
Photo instructions:
How to cover the roof with corrugated board with your own hands and plus not slip and cut your hands? Profiled flooring has very sharp edges, and therefore, strong gloves are required to work with it.
And for free movement on the roof, soft shoes will be needed. For safety during the period of movement, one should step into the deflection of the leaf where there is a crate.
Let's start installation
At the initial stage of installation, we find the angle of the roof slope, based on the fact that it depends on how the roofing material will be laid correctly. At different angles of inclination, a different size of the overlap of the leaves is taken.
For example, with a roof slope of 30 degrees, the overlap will be 100-150 mm, and with a slope of 14 degrees - 200 mm. If, for example, the slope angle is less than 12°, all horizontal and vertical overlaps should naturally be finished with silicone sealant.
Sealing tape is used to install profiled flooring on a sloping roof.
You can cover the roof with corrugated board with your own hands using the usual technique, but if, for example, good installation work is needed, then you should first develop an accurate plan for all work, and then definitely follow the sequence of actions.
The calculation of the required material is best done using a specialized program. Before counting, you need to make measurements, take into account the length of the slopes, the perimeter of the building and other indicators.
Then they build a crate and in the surface of the rafters they carry out preparatory insulation work and hydro-insulation of the roof and cover it all with a film.
Instead of a film, you can use a vapor barrier membrane, but you need to know that it is fixed from the side of the room. The bars of the crate will need to be finished with an antiseptic in advance.
The step of the lathing must correspond to the thickness and grade of the profiled sheets, and plus to this angle of inclination of the roof.
For example, when laying corrugated board C-20 and a roof slope of 15 degrees, a continuous crate is installed, and with the same kind of slope, but grade C-44 corrugated board, the sheathing step will be 500 mm.
Sheets of profiled flooring lie on the frame. Installation work began from the lower corner of the left or right slope. Put leaflets with a ledge over the line of the eaves.
The profiled sheet is fastened strictly into a wave with specialized roofing screws measuring 4.8x3.5 mm. For 1 sq.m. material for roofing is spent 6 screws.
On the crest and eaves of the roof, self-tapping screws should be screwed through each deflection of the profile wave. Between themselves, the sheets of corrugated board are fastened with 0.5 mm self-tapping screws or rivets.
After the complete laying of the profiled flooring, all vertical and horizontal overlaps are finished with silicone sealant, and the places of cuts and chips are finished with specialized enamel.
We cut around the pipe
Sometimes it is necessary to cover the roof with corrugated board around the pipe. For a good connection of the roof from the profiled flooring and the pipe, a specialized apron is used.
For its production, adjoining strips of leaves are used from below. The bar is placed against the side wall of the pipe and the upper level is noticed. Then, according to this markup, chasing is performed.
The apron began to be placed at the bottom of the pipe. Already in place, an irreversible trimming of the mount and its slats is done with the help of screws. By the same rule, an apron is performed on the other sides.
The entry point of the bar into the strobe is sealed with a sealant. After that, under the part of the unusual apron located below, an iron leaf is wound up - a tie. On the edges of the tie with a hammer or pliers, a side is made for drainage to the cornice or into the valley.
Roofing material is installed on top of the tie. After the roof is ready, a tie is made for decorative work, which is fastened from the outside on the upper edge.
Its installation work is done in the same way as the installation of an internal tie, only without gating. As you can see, everyone can independently cover the roof with corrugated board, you just need to carefully follow the technique.
Krom car garage
You can cover the roof of a car garage with corrugated board in just 1 day. This requires 1 or 2 assistants and the necessary materials with tools.
First, the base of the roof is assembled - rafters, then the crate is made, materials for waterproofing and insulation materials are laid down.
The whole system is covered with a film to protect against moisture. After all the preparation, the installation work of the profiled flooring occurs, which is laid according to the classical method and fastened with self-tapping screws.
We cut a hipped roof
If, for example, it is necessary to cover a hipped roof with corrugated board, then purchase sheets with a galvanized coating of average hardness.
After all, the heavier the roof configuration, the more waste remains when cutting profiled flooring. And leaves of average hardness are very easy to cut, which is why there is practically no waste left, which makes it possible to economically spend material.
The installation work of the material for roofing work on a hipped roof arises from the center of the triangular end of the slope. The sheets are aligned along the eaves along a stretched cord, and not along the end, just like with a gable roof.
We cut the mansard roof
Covering the attic roof with corrugated board is very simple, based on the fact that this version of the roof is a type of gable roof.
The installation work of the coating is done according to the same methodology, but if, for example, the profile of the attic roof is laborious, then a valley is fixed in its corners with self-tapping screws, which prevents moisture from entering the joints into the room.
We cut a broken roof
Broken roofs, like gable roofs, are considered the most popular, but covering a broken roof with corrugated board is much more difficult than gable roofing.
installation installation installation began from the lower right corner of the roof. From the end of the roof, the sheet should have a release of 100 mm, and from the bottom edge of the wooden crate, the leaf should recede by 200 mm.
The subsequent installation work of the profiled flooring is done according to the simplest scenario.
Service price
How long does it take to cover the roof with corrugated board? The cost of such work depends mostly on the shape of the roof, the heavier roof, the more expensive its coverage will be limited.
Not a small value is exerted on the price of roofing services by the angle of the slope of the roof and the number of different connections.
And therefore, when calculating how much it costs to cover the roof with corrugated board, it is necessary to take into account not only the price of materials, but also the shape of the roof, and plus the complexity of its waterproofing and insulation.
We think you liked the article - How to properly cover the roof with corrugated board?
- How to cover the roof with corrugated board with your own hands?
- Let's start installation
- We cut around the pipe
- Krom car garage
- We cut a hipped roof
- We cut the mansard roof
- We cut a broken roof
- Service price