Insulation of the attic from the inside, if the roof is already covered: the order of work and useful tips. How to insulate the attic from the inside if the roof is already covered? Insulation of the attic floor from the inside
1.
2.
3.
4.
5.
6.
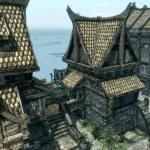
The problem of energy saving is always relevant for homeowners, so they try by all available means to reduce heat losses, which, as you know, occur as a result of poor thermal insulation of the roof, walls and basement. Houses built a long time ago usually have an attic, which is used as a place to store old and unnecessary things. In newly built buildings, the owners now prefer to equip a mansard roof (see photo), the premises of which can be used not only for household needs, but also as an additional living room. It is advisable to figure out how to insulate the attic roof from the inside without making popular mistakes.
If it is possible to do the insulation of the mansard roof from the inside of the house with your own hands, then the work outside the building should be entrusted to specialists.
The choice of insulation
The solution to the question as to how and what is better to insulate the attic from the inside and outside depends primarily on the roof structure of the building and on the weather conditions of the area in which it is located. You can get acquainted with the basic requirements and norms regarding thermal protection for different climatic zones in SNiP 23-02-2003.
Today, the domestic construction market offers a huge selection of materials of various characteristics and cost for insulation, waterproofing and vapor barrier of roofs, walls and basements. It is difficult to make a choice for a person who has never done such work before, but it is possible if you first study the information, do it yourself or consult with professionals or acquaintances who are competent in this matter.
Styrofoam. A lot of homeowners are attracted to such insulation as polystyrene because of its low cost (read: ""). This is where the advice of professionals comes in handy, who claim that, despite its many advantages, this material has low vapor permeability and the room will be constantly humid. Over time, when the wood of the rafters dries out, gaps appear between them and the foam, through which the cold penetrates into the room under the roof. Rodents also like to settle in this heater.
Extruded polystyrene foam. No less popular insulation than polystyrene and in its characteristics is very similar to it. Only the technology is different, according to which it is performed from the inside with foam. Expanded polystyrene plates are laid on top of the rafters so that there are no gaps. The material in the form of plates is produced with stepped joints or according to the type of construction “thorn in the groove”. As for the price of insulation, it depends on its thickness, and the total cost of the work depends on the size of the room.

Glass wool.
The technology according to which the roof of the attic is insulated with one's own hands using glass wool is in many ways similar to working with mineral wool, but the material itself differs in structure:
- glass wool has longer fibers than mineral wool, so it is more durable, resilient and has better soundproofing characteristics;
- the hydrophobicity of glass wool is less than that of mineral wool;
- glass wool can be used at lower temperatures.
Combined insulation. When we insulate the attic with our own hands, you can use several heat-insulating materials, based on their advantages. For example, to fill the gaps between the rafters, it is desirable to use mineral wool, and lay polystyrene foam on top under the roof on the truss structure.

This method of insulation is considered one of the most effective for a number of reasons:
- since ecowool consists of 80% paper, its properties are similar to natural wood, which in turn is an environmentally friendly material;
- in terms of heat-insulating parameters, it is similar to glass wool;
- the use of ecowool allows you to qualitatively fill all the elements of the structure, which leads to a significant reduction in heat loss;
- the composition of the insulation contains a natural antiseptic - borax, which prevents the formation of fungus and mold on wooden parts;
- ecowool provides high-quality sound insulation;
- during operation does not lose its original volume.
Polyurethane foam. Refers to sprayed heaters. To insulate the attic with polyurethane foam, special equipment (portable units) is required. With a weight of 50 kilograms, one device covers approximately 100 "squares" of area. Additional is not needed. The coating fills the existing voids and gaps to the maximum, while the service life of the material is more than 25 years. After the attic insulation is completed with polyurethane foam, the composition hardens within one minute. The reason why polyurethane foam for thermal insulation is used infrequently is its high cost.

Penofol. Insulation refers to modern materials for insulation and vapor barrier, the material has a reflective effect and soundproofing properties. On one or both sides, the foamed polyethylene is covered with high-quality aluminum.
Insulation of the attic from the inside with penofol is preferable for a number of reasons:
- ecological cleanliness;
- low thermal conductivity;
- the closed system of air bubbles of polyethylene foam prevents the penetration of steam.
Attic wall insulation
Now the attic is initially planned during the development of the house project, so its shape depends on the roof structure, and the roof elements become the walls. Most often, a gable roof is created in individual buildings, since it allows you to maximize the use of the attic area. Often, interior walls for a room on the roof are not made at all. When the gable roof has a slope of 45-60 degrees, then the internal walls of the attic are erected additionally to a height of 1-1.2 meters. At the same time, the height of the room must exceed 2.2 meters, and the width must be at least 2.4 meters. The insulation of the attic walls from the inside depends on how the roof is insulated.

Currently, the following methods of attic insulation are used for thermal insulation of the roof:
Attic floor insulation
To insulate the floor, various heat insulators are used. Materials are placed between the lags or on the subfloor. To insulate the flooring with fiberboards, first two layers of roofing material are laid, and then two rows of fibreboards. A clean floor is laid on top.
Sometimes they use a long-known method - insulation with sawdust, which is poured
15-20 cm layer on the roofing material in the intervals between the lags. So that mice do not settle in the heat-insulating layer, sawdust should be mixed with lime. It is bad that such a heater refers to flammable materials.

Attic ceiling insulation
When using ecowool, a crate is specially mounted on a false ceiling, which is covered with a vapor barrier film (more: ""). If polyurethane foam is used, then it is applied to the mounted roof from the inside, and the hemmed ceiling, if necessary, is insulated with mineral wool or glass wool (read: "").
Insulation of the attic gable from the inside
The presence of a vapor barrier is necessary when ecowool, glass wool, mineral wool, polystyrene are used. Additional vapor barrier is not needed when using foam or polyurethane foam.
The conditions for comfortable living in the attic rooms directly depend on the correctly made heat-insulating layer. Insulation of the mansard roof will allow you to save precious heat in the winter, and in the summer heat it will create such a pleasant coolness in the rooms. But the creation of truly reliable and effective thermal insulation for the attic roof requires knowledge and understanding of insulation technology. In general, to perform the insulation of the attic roof with your own hands, you will need skills in handling the tool, desire and time.
Technology and scheme of mansard roof insulation
The technology of mansard roof insulation is in many ways similar to conventional roof insulation, with the only difference being that more stringent requirements are imposed on the attic roof. This is due to the design feature of the attic as a whole. It's all about the walls of the interior, which are literally drawn close to the roof, and in some designs they are one whole. That is why the attic rooms cool faster in winter, and warm up very much in the summer heat.
The very same scheme of insulation of the mansard roof is a multilayer cake, consisting of the following layers:
- vapor barrier;
- thermal insulation;
- ventilation gap;
- waterproofing;
- roof.
Roof insulation scheme, video:
Each of these layers performs its task, and their presence is mandatory. But before insulating the mansard roof, the greatest attention should be paid to the heat-insulating layer and ventilation, since 80% of success in achieving comfortable living in the attic rooms depends on these two elements.
To answer the question of how best to insulate a mansard roof, you need to know why insulate it at all. So, the first thing thermal insulation is needed for is keeping warm during the cold period. The second is protection from excess heat during a hot period. For those who do not know yet, all thermal insulation materials have such an indicator as thermal conductivity, which is responsible for the transfer of heat from or to a room. The lower this index, the less heat penetrates through the layer of material and the smaller the thickness of the thermal insulation is necessary to obtain optimal insulation characteristics.

The importance of thermal conductivity cannot be underestimated. And that's why. We already know that the walls of the attic are integral with the roof. And in winter, in the heated attic room, most of the heat from the house goes towards the roof, and the unshakable laws of physics are to blame for this. Heat is transferred to the roofing material, covered with a layer of snow, which, by the way, is a natural insulation. Snow, due to its structure and internal air pockets, acts as an external insulation in the low temperature range from -2 °C. And now, when the warm roof and snow come into contact, the latter thaws a little, and since it is cold outside, it freezes again, forming an ice crust. But already ice does not have the thermal insulation properties of snow, in addition, it makes the roof heavier and destroys the roofing. If the thermal insulation of the roof, the roof in particular, is done correctly, then in winter the snow on the roof will lie evenly and not thaw.
As for the function of thermal insulation in the warm season, then everything is somewhat simpler. In the summer heat, excess heat from the roof is transferred inside the attic, and being in the room becomes simply unbearable due to the heat, and even several air conditioners cannot cope with this level of heat. A layer of thermal insulation will prevent this process, providing coolness under the roof. Of course, in comparison with the first floor, the temperature will be several degrees higher, but in the end it will be quite acceptable.

Now, knowing and understanding why roof thermal insulation is needed, you can turn your attention to the roof structure and its effect on high-quality thermal insulation. To make the attic thermal insulation correctly, it is necessary to compare the device of a conventional roof and an attic one. It immediately becomes apparent that the difference lies in the size of the ventilation space between the roof and living quarters. And if an ordinary roof has an attic with dormer windows for these purposes, then the ventilation space of a mansard roof is limited to 10 - 15 cm. For a properly made mansard roof, the presence of competent ventilation is no less important than the thermal conductivity of materials. There are several reasons for this. Firstly, ventilation removes excess moisture from under the roof, preserving and extending the life of the entire structure. Secondly, in winter, ventilation does not allow the roof to overheat, keeping the snow cover from melting and preventing the formation of ice. Thirdly, in hot summers, ventilation removes part of the heat from under the roof, preventing overheating of the interior and roof structural elements.
Material selection
Video: mansard roof insulation
Before starting work, it is necessary to determine the material of the insulation, since the number of layers of the heat-insulating cake and its thickness will depend on it. Today, the market can provide a huge selection of different thermal insulation materials. Popular are mineral wool, glass wool, Styrofoam, extruded polystyrene foam, foamed glass, polyurethane foam. In addition, do not forget about natural heaters - wood chips, paper, straw. But when choosing one or another material for attic roof insulation, it is necessary to focus on four main parameters. The first, already known to us, coefficient of thermal conductivity. For roof insulation, it is best to take material with a coefficient of 0.05 W / m * K and below. The second parameter is moisture resistance and the higher it is, the better. The third one is fire resistance. And the fourth - environmental safety of the material. There are no special questions with the last two parameters, since they do not indirectly affect the specifics of creating a heat-insulating cake. But the coefficient of thermal conductivity and moisture resistance can incline to the choice of a particular material.

Choosing as thermal insulation mineral wool or glass wool, it is necessary to be prepared for the fact that over time the insulating qualities of these materials will deteriorate greatly. This can happen for two reasons. The first is that the material was caked or, on the contrary, crumbled. The second - the level of moisture in the material exceeded all allowable standards. These problems are not surprising. Cotton wool, whatever it is, remains cotton wool, a material that is very susceptible to absorbing moisture. In addition, this material does not tolerate mechanical loads well and collapses under their influence. Another disadvantage of wool as an attic roof insulation is the need to create a thick cake of 3-4 layers of insulation to achieve the desired result. In conclusion, for thermal insulation from cotton wool, it is necessary to make several layers of vapor and waterproofing. But the price of cotton wool and its general availability make it very attractive.

It is also possible to insulate the mansard roof polystyrene. This material is not afraid of water and has excellent thermal insulation characteristics. But here you should be careful when choosing, since not every foam is suitable for these purposes. The closest to the foam in terms of performance and often used is extruded polystyrene foam. This material is also not afraid of moisture, has a flammability class from G1 to G4, and also has a thermal conductivity coefficient of 0.05 W / m * K. Among the shortcomings of expanded polystyrene, its synthetic origin and rather high price should be noted.

For those who prefer to build from absolutely environmentally friendly materials, suitable as thermal insulation granulated paper, foam glass, reeds,straw or seaweed ladders. The listed materials have excellent thermal conductivity, are environmentally friendly, but, like any other material, each of them has its own drawbacks. Foam glass is too fragile. Reeds, straw and seaweed are flammable and require skill in their use. Granular paper requires special equipment and skills.
How to properly insulate a mansard roof

All work on the insulation of the attic roof comes down to preparing the space for thermal insulation, laying and fixing materials in place. To do this, do the following:
- even at the stage of erecting rafters, you need to worry about the step with which they will be installed. The step itself should be chosen one that will maintain the reliability of the roof structure and at the same time allow you to place mats or thermal insulation slabs between the rafters;
- if a thermal insulation material is used that is not susceptible to moisture, then a vapor barrier is not required. Otherwise, for example, for mineral wool, a layer of vapor barrier is laid over the rafters;
- a counter-lattice and a crate are stuffed, on which a layer of a waterproof vapor-transparent membrane is laid. The gap that will be obtained between the counter-lattice and the insulation will perform the functions of ventilation. In addition, ventilation ducts can be installed in the roof;
- inside, between the rafters, thermal insulation is laid and fixed there. But there is one important point here. The rafter leg is made of either wood or metal, in any case, the thermal conductivity of the rafter is much worse than that of the thermal insulation material. Therefore, the rafter serves as a cold bridge. To protect yourself from this, another continuous layer of thermal insulation is equipped on top of the already laid thermal insulation and rafters. Unfortunately, this will hide the rafters, to which other elements of the attic structure will be attached in the future. And to facilitate further work, it should be noted where the rafter passes;
- a layer of vapor-permeable film is laid on top of the thermal insulation and everything is fixed with an internal crate.
Video: how to insulate a mansard roof
Today, the attic is popular with owners of country houses. But many pay too little attention to its insulation and remain disappointed after living in it for some time in summer and winter. But, understanding the purpose of roof insulation and equipping it according to all the rules, you can experience all the positive aspects of living in a country house with an attic.
Today we will talk about the insulation of the attic. What is an attic? Attic - the same attic, if in our opinion. Only used for commercial or residential purposes. Of course, when using it, roof insulation is required. After all, you will not live in a cold room? If there is heating in the attic, its entire effect will be destroyed by an uninsulated roof. Keep in mind that warm air always rises. If there are no obstacles in his way, he will easily leave the house through the roof. Therefore, attic insulation is a necessary operation for its improvement.
- insulation is done before the final installation of the roof (slate, tiles, profiled sheet) - put insulation on top, from the side of the street;
- insulation stacked from below, with the finished roof, the work goes inside the attic.
As a rule, the first method is most often used during the initial construction. Then, when it is planned in advance to use the attic. This method is also used in case roofing or building modifications.
The second type of insulation installation is used more often. After all, with this method it is possible to conduct work at any convenient time. For example, there is an addition in the family, and at the family council they decided to allocate a separate room to one of the family members. But there is no money to build a good addition to the house. Exit one - equip a room in the attic, make a residential attic. You can gradually insulate it in the cold season (of course, not in severe frosts).
Types of roof insulation
There are several types of insulation used for roof insulation. In the technical language of builders, they are called roofing heat-insulating materials. Consider the most popular of them.

Which one to use for you personally - decide for yourself. All these materials are used precisely as roofing heat-insulating materials. Each has its pros and cons. It is only necessary to take into account that loose heat insulators (cotton wool) are more difficult to lay during installation - plates and mats are easier to fit than rolls or just bales. But again - when laying cotton wool easier to ensure the absence of gaps in the layer. In addition, the material for insulation should be environmentally friendly, because the room is insulated as a result from the inside, and not from the outside. In this regard, mineral wool and glass wool lose to other materials: mineral wool sometimes contains high levels of formaldehyde- substances that are very harmful to health, and glass wool can bring glass particles into the body. It is better to use them when arranging the attic for economic purposes.
Stages of roof insulation with polystyrene foam
 In view of the above, we will briefly consider the stages of roof insulation using extruded polystyrene foam. In fact, it is a modern heir to foam, but surpasses it in terms of strength and insulating properties. Pretty resistant to ultraviolet radiation. Available in sheets of various sizes and colors.
If our roof has already been installed in accordance with all the rules, then it already has waterproofing. It is a film over the entire roof area, located directly below the roofing. In the absence of waterproofing, installation will have to be done from the outside - it will be necessary to remove the roofing and make waterproofing. And since the roof is dismantled, it will be easier and more convenient to do everything from above - it is easier to lay a layer of heat-insulating material. But we proceed from the fact that there is waterproofing, so in our case we will insulate the roof from below - from inside the attic. So let's get started.
- The first thing to do is treat the wooden elements of the roof with an antiseptic and let it absorb well and dry. It is better if the treatment is carried out with a flame retardant. Of course, if there are rotten or moldy parts, they should be replaced.
- The next stage is the fastening of sheets of extruded polystyrene foam into the openings between the roof rafters. In this case, special fasteners should be used - brackets or corners (which you will find on sale). They can also be supported by thin rivers nailed across the rafters. Between the waterproofing and the sheets there must be a gap of 2 to 5 cm - to ensure ventilation. The sheets should be fastened carefully, leaving no gaps between them and the rafters. If there are gaps, they should be sealed with cut pieces of polystyrene foam or mounting foam. Usually the thickness of the sheets is less than the thickness of the "legs" of the rafters. In this case, the sheets are laid in several layers, and joints (joints) of sheets are made in different places- to avoid cracks. The laid and fixed sheets, together with the mounting rails, must form a flat surface without protrusions and slots.
- Next, we attach a layer of vapor barrier. They serve as a special film. It may look like a regular one, or it may be in the form of a membrane, foil or perforated. The film is attached to the rafters with a stapler with a small with an overlap of 10-15 cm. These joints, especially at the rafters, are additionally sealed with a special tape. This is due to a decrease in vapor barrier properties at the junction with the rafters. Usually the tape should be glued across the rafters. You do not need to pull the film strongly, let it sag a little (up to 1 cm) in the middle of the opening.
- At the final stage, we do a fine finish - we fix the lining, plastic, sheets of moisture-proof fiberboard, chipboard, plywood or drywall. Can be mounted close to the vapor barrier, but it is possible on a thin crate of slats. If necessary, glue wallpaper or cover with varnish or paint.
 The result of the roof should look the same as in the picture on the left. At all stages of installation, we do not forget about the reliable insulation of engineering systems, if any. It is better to install electrical wiring in a non-combustible cable channel or corrugation, and use metal and asbestos materials for the chimney. Next, consider some of the nuances of insulation.
If you do not have waterproofing, then you definitely need it mounted between the roof and insulation. In this case, one should not forget about the ventilation gap - it is better if it is on both sides of the waterproofing. If this requirement is not met, the attic room will have a specific, uncomfortable microclimate.
Not worth the whole process of work save on the quality of materials. Both in the direct technical sense and in the ecological one.
When choosing mineral wool as a heat-insulating material, do not forget that it pretty heavy, and with time begins to lose shape - sag. To prevent this, mount the supporting elements (battens) as often as possible.
Use glass wool - carefully insulate it with a vapor barrier and exterior finishes from the living volume of the premises.
I hope that after reading the article, you will have a complete understanding of how to insulate your attic. With the right heat-insulating materials and their installation in your house or cottage, there will be one more living room.
Video instruction for attic insulation with foam plastic
September 7, 2016
Specialization: Capital construction works (laying the foundation, erecting walls, constructing the roof, etc.). Internal construction works (laying of internal communications, rough and fine finishing). Hobbies: mobile communication, high technologies, computer equipment, programming.
Some time ago, I completed an order for attic insulation for winter living. While doing the work, I thought that the technology I used is quite simple and even an unprepared person can make thermal insulation with their own hands from the inside.
In today's material I will tell you what is better and how to properly insulate the attic from the inside with your own hands. This guide will help you avoid the same mistakes that I had to make in the beginning of my career as a builder.
I assure you that at the end of the work, the attic floor of a wooden house will turn from a useless trash storage into a cozy and comfortable room, for which all your household members will fight to live.
Features and methods of insulation of the attic room
Before talking about ways to insulate the under-roof space from the inside, I want to note that this is a must, even if you are not going to live in a house in the winter. The fact is that the attic, due to its location, is very warm by the sun in the summer, so without a reliable insulating layer, the temperature inside will be uncomfortable (or you will have to install a very powerful air conditioner).

If you have already insulated ordinary living quarters and think that you know how to insulate the attic, I have to disappoint you. The thermal insulation of a room under the roof (not an ordinary room on the second floor, namely the attic) has some features that I simply have to mention:
- The geometry of the attic room follows the contours of a pitched roof, therefore it is far from a standard cube or parallelepiped. Insulation will have to be installed on inclined surfaces, so the choice of heat-insulating material will have to be approached with great care. For example, the use of too soft and flexible products is completely excluded.
- The roof truss system and roofing are always made of lightweight materials so as not to exert a large load on the load-bearing walls of the house. Consequently, the heat-insulating cake should weigh as much as to only slightly weight the structure, otherwise the roof may collapse with a significant snow load.
- In addition to the roof slopes, the attic has two more gables and a floor (it is also an attic floor). If these surfaces are not insulated, all efforts to install insulation in the rafters will not lead to any significant result.

- Roofing material, no matter how reliable it may be, can pass atmospheric moisture, which, in turn, can damage the insulation layer or significantly reduce its technical characteristics. Therefore, during installation, it is necessary to reliably protect the thermal insulation from moisture.
- When buildings catch fire, the fire usually moves to the upper part of the dwelling, where the attic is located. Therefore, to ensure the possibility of evacuating people from this room for thermal insulation, I personally recommend using non-combustible or poorly flammable heaters. After all, the matter is further aggravated by the fact that the roof truss system is made of wood, which cannot be classified as NG.
- And last but not least, environmental friendliness. Care must be taken to ensure that the insulation does not pose a danger to people living in the attic, regardless of the conditions of its operation - heating, moistening, freezing, and so on.

First, let's decide on the method of thermal insulation. There are two options:
- Insulation of attic walls. This method is resorted to in the case when the roof slopes are not the walls of the attic. The role of the latter is played by additional partitions made of wood, drywall, plywood, and so on, which should be insulated.
The advantage of this method is the presence of additional ventilated space under the roof. Minus - a decrease in the useful area of \u200b\u200bthe room.

- Insulation of roof slopes. In this case, the heat insulator is installed in the truss system, after which you can divide the spacious attic with thin partitions, without worrying about cold or heat. The advantage is that the entire under-roof space will be insulated. And with the help of partitions, you can divide it into several separate rooms, arranging an additional pantry in the attic room.
I prefer the second method of insulation, so it will be discussed further.

Choice of materials and tools
It's time to decide how to insulate the attic room from the inside. To do this, you can use expanded polystyrene, expanded clay, polyurethane foam, ecowool and many other heat insulators that domestic and foreign industries offer to purchase.
But I am insulating the attic with basalt wool. This material, in my opinion, best meets the requirements for the heat-insulating layer of such a room.

I will briefly list the most important advantages of basalt mats:
| Characteristic | Description |
| Low thermal conductivity | The material retains heat indoors so well that for effective thermal insulation it is enough to install a layer 10 cm thick. |
| Hygroscopicity | Basalt fibers do not absorb water and have hydrophobic properties, so moisture that has got inside is quickly removed through the gaps without reducing the operational properties of the material. |
| Vapor permeability | The material does not prevent air infiltration, normalizing the humidity in the attic and extending the life of wooden parts. |
| Incombustibility | Basalt wool does not ignite in a fire and contributes to the extinction of the flame, giving time for the evacuation of people or the elimination of the source of ignition. |
I could talk about the advantages of mineral wool for a long time, but this is not the topic of today's article. Therefore, he simply noted the better it is to insulate the attic from the inside.
I prefer to use TechnoNIKOL Technolight Extra basalt mats 10 cm thick, 120 by 60 cm in size. It is not advisable to buy a denser material, since it will not experience load between the rafters.
It is very important to pay attention to the dimensions of the material. I chose TechnoNikol mats because their width is 60 cm, namely, this is the distance between adjacent rafters in the case I am describing.

In addition to direct thermal insulation, other materials are also needed:
- Wooden bars with a section of 30 by 50 mm, with the help of which a counter-lattice will be formed for ventilation gaps that help remove moisture.
- Super diffuse vapor permeable hydro- and windproof membrane. These films are of especially high quality from Strotex and Juta, so I recommend buying them.
- Penofol. A thermal reflective material that I'm going to use in place of the standard vapor barrier film that keeps the mineral wool from getting wet from inside the room.

- Antiseptic primer. She needs to process the roof trusses to prevent the appearance of mold and fungus. You can buy a composition with fire retardants, thereby increasing the fire safety of the building.
- OSB boards. They will be needed to construct the crate, on which flexible tiles are laid on one side and eurolining on the other. If you are going to use other materials, then a solid crate may not be needed.
- Polyurethane mounting foam. Useful for sealing joints between mineral mats.
- U-shaped perforated brackets for mounting galvanized lathing. For me, they will hold the installed mineral mats in place until they are sewn with decorative material.

Well, now you can safely move on to how to insulate the attic from the inside with your own hands.
Arrangement of insulation
The whole process of warming can be conditionally divided into several steps:

So, I will explain how to do the work correctly with my own hands in each of the mentioned stages.
Step 1 - Laying waterproofing and roofing material
Let's start with the installation of the waterproofing membrane, since it is installed outside the room before fixing the roofing. Only in this way can the insulating layer be reliably protected from the ingress of atmospheric moisture into it.
I must say right away that the entire roof truss system in the case I am describing was installed. However, the roofing material and the crate on it have not yet been laid.
The process consists of the following steps:
- I roll out the first layer of hydro- and windproof membrane. You need to start work from the bottom of the roof slope, gradually moving up. The membrane is fixed with staples and a construction stapler or wide-head nails. It is necessary to install the film not in tension, but with a slight sag (about 2 cm per meter), so that when the air temperature decreases, it does not tear.

- I lay the second and subsequent sheets of waterproofing film. You need to act in the same way as in the previous paragraph. But there is one point here. The edge of the upper membrane must overlap the edge of the lower one by 10 cm to ensure complete impermeability to moisture.

- I seal the seams of the membrane. For this, adhesive tape is used. It just needs to be glued to the joints of adjacent waterproofing membranes.
- I install a control panel. Its role is played by wooden bars, which are fixed with self-tapping screws over the waterproofing membrane on the rafter supports. Previously, I recommend impregnating them with an antiseptic and flame retardant in order to extend the life of the roof structure.
- I fix the boards of the additional crate. They are installed perpendicular to the rafters and fastened with self-tapping screws to the counter-bar. The step between adjacent parts is about 40 cm.

- I install OSB base plates. They are attached to the boards with self-tapping screws. Here it is necessary to monitor the length of the fastening fittings so that too long screws do not tear the hydro- and windproof membrane located below.

- Installing a flexible roof To do this, a lining carpet is glued to the slabs, after which shingles of flexible tiles are fixed on it.

If you are insulating the attic with a finished roof, then the waterproofing membrane will have to be installed from the inside. This method has two disadvantages:
- the labor intensity of the work being carried out increases;
- waterproofing film will not protect the wooden roof trusses.
It is necessary to fix and seal the film so that it wraps around the rafters and adheres to the roofing sheathing. Thus, peculiar baths are formed, in which insulating material will be invested.

But before that, it is necessary to prepare the under-roof space for the installation of mineral mats.
Step 2 - Preparing the truss system
The space under the roof, namely the truss system, is being prepared for thermal insulation:
- I clean wooden parts from dust and debris, remove objects that interfere with the installation of mineral mats. It is best to clean the rafters with a vacuum cleaner, which will remove dust, sawdust and shavings left after the installation of the roofing material. You should also check if the sharp ends of screws, nails, and so on do not stick out from somewhere. They can cause injury or damage insulation materials.

- I install engineering communications and insulate them. Ventilation and chimney pipes can be installed on the roof, as well as electrical wiring necessary to connect household appliances in the attic room:
- Ventilation pipes, if they are laid in the non-insulated part of the attic, must be thermally insulated with mineral wool or foam shells.
- For a chimney, a box should be designed to pass through the attic floor and roof. They must be filled with heat-insulating material (most often perlite or expanded clay), which will increase the fire safety of the room.
- Electrical wiring should be placed in polymer flexible or rigid cable ducts that will prevent the rafters and insulation layer from igniting in the event of a short circuit.

- I prime wooden surfaces. For work, it is better to use a universal composition that has both antiseptic and fire-fighting properties. For example, the composition for wood BS-13 or Fire protection Strazh-2. It must be applied to wooden parts with a roller or sprayer, after processing in two layers with intermediate drying for 3 or 4 hours.

- I install U-shaped brackets on the side surfaces of the rafters. It is not necessary to use them, since with the correct installation of the rafters, the mineral mats become tight by surprise. But I'm used to playing it safe, and their acquisition does not hit hard on the budget planned for insulation. But if you use cotton wool in rolls, you can’t do without it.

Step 3 - Installation of thermal insulation
Insulation of the attic from the inside continues. Let's move on to the main part:
- I do cutting mats. Mineral wool is cut into the required pieces with a sharp knife or saw with very fine teeth. If the distance between the rafters corresponds to the width of the insulation, there is practically no need to trim.

- I install mats between the rafters. To do this, you need to slightly bend the material in the middle, and then insert the insulation in the right place. Having straightened, the basalt mat will take its place and will not fall out of the inclined surface.

- I fix the mats with brackets. You just need to bend part of the bracket so that its edge is on the surface of the mat and holds it in place. Instead of brackets, you can use galvanized perforated tapes that are attached directly to the lower edges of the rafters.
- I seal the seams of the material with polyurethane mounting foam. Gaps must be filled with a gun. Moreover, act in such a way that the composition is inside the entire gap, and not just on its surface. If you make a mistake at this stage, cold bridges may form at the joints, which will reduce the effectiveness of insulation.

To increase the reliability of the heat-insulating layer, you can install not one, but two layers of insulation. Just take mineral mats with a thickness of not 10, but 5 cm. Then the individual layers are installed so that the joints are apart. And cold bridges can not be feared at all, although it is still worth sealing the seams.
Step 4 - Finishing coat
Decorative finishing of the enclosing structures of the attic room is carried out as follows:
- I install a heat-reflecting and vapor barrier layer. As you understand, penofol will serve me for this - foamed polyethylene with a reflective layer of polished aluminum foil. It is mounted as follows:
- The first sheet of penofol is installed with a foil layer towards the living quarters, after which it is aimed at the rafters using a construction stapler.
- The second and subsequent sheets of material are installed so that between the individual elements there is an overlap of 10 cm.
- Penofol joints are glued with double-sided adhesive tape (inside the joint) or metallized tape (which is glued on top of the joint). It is necessary to make sure that a completely homogeneous and sealed layer is formed.
- If the thickness of your rafters is such that the edge of the insulation does not reach the cut of the tree, then penofol must be laid on the surface of mineral wool, fixing it on the side surface of the roof support beams. Otherwise, it may rustle when air passes through the ventilation gap.

- I mount the bars of the control battens for arranging the ventilation gap. It is necessary to fasten the planks with self-tapping screws to the rafters on top of the foam. These details create a gap between the finish and the heat-reflecting surface, which is necessary to remove condensed moisture.

- Installing OSB boards. They are attached to the counter-lattice with self-tapping screws. Everything is standard here, with the exception of some small nuances:
- It is necessary to install the sheets so that at the edges (at the gables and the floor) there is a gap of 1-2 cm thick. It is necessary to remove excess moisture and compensate for possible changes in the size of the material.
- The seams between adjacent slabs should be staggered (staggered) and be 2-3 mm thick to avoid warping of the surface during thermal expansion of the base.
- It is necessary to fix the plates so that their edges are located on the bars of the counter-lattice. The distance between the screws is no more than 20 cm.

You can later install eurolining or other decorative material on the plates. And we have ahead of the insulation of the gables, which form two of the four walls of the attic room.
Step 5 - Warming the gables
I strongly advise these parts of the attic to be insulated from the outside, using dense mineral wool for this, which can be covered with cement plaster on top. The scheme of work is as follows:
- Preparing the surface for work. To do this, you need to clean the surface of the walls from the remnants of mortar, debris, dirt and dust. After that, the following operations are performed:
- Damage repair. If gaps and cracks are found in the masonry, they must be sealed with cement mortar or blown out with mounting foam.
- Surface priming. To do this, you need to take a primer for a brick or (not the one with which you processed the rafters), and then cover the pediments with it in two layers with intermediate drying.

- I mount the start profile. This is a perforated galvanized part on which the insulation layer will rest. It is fixed at the bottom of the wall strictly horizontally. If several of these parts are needed, then install them with a small gap to compensate for the thermal expansion of the metal.

- I glue the first row of mineral mats.
Let me remind you that you need to use dense mineral wool, which is intended for subsequent finishing with cement mortar. The sequence of actions is as follows:
- The surface of mineral wool is pre-reinforced with cement glue, which is evenly distributed over the slab with a spatula.

- A bead of cement glue is applied to the mineral wool at a distance of 5 cm from the edge. Several lumps of glue are also placed in the middle of the mat so that at least 40% of the sheet surface is covered.
- The part is attached to the wall. at the same time, its lower end must be supported on a pre-installed starting profile. Using a water level, it is necessary to check that the basalt mat is installed strictly vertically in all planes.
- Behind the first layer, other mats are glued to the wall in the same way. It is necessary to follow the verticals, and that the seams between adjacent parts are minimal.
- I glue the second and subsequent rows of mineral mats. There are no differences compared to the procedure described in the previous paragraph. You just need to make sure that the vertical ones go sideways. That is, the seam of the upper row fell in the middle of the insulation sheet of the lower row (as in brickwork).
- After the solution hardens, I fix the insulating layer with dowels - “fungi”. They are installed as follows:
- A hole is drilled directly through the mineral mats in the wall with a perforator, the depth of which in brick or concrete should exceed 2 cm.
- A dowel is inserted into the resulting hole, after which the core is installed inside.
- Using a hammer, the core is hammered into the dowel so that its cap is slightly recessed into the surface of the insulation.
- It is not only mineral mats that need to be fixed. "Fungi" should be installed in the seams of the insulating material so that the heat-insulating layer does not come off under load.

- I seal the seams of the material. To insulate the joints, polyurethane foam is used, which glues the fibers of the insulation together, preventing the formation of cold bridges at the junctions of adjacent mineral plates. It is necessary to fill the seam with a gun as tightly as possible.
- I reinforce the surface of the insulation with an alkali-resistant fiberglass mesh. To do this, mineral mats are covered with a reinforcing compound, after which a mesh is placed on it and pressed into the mortar with a plaster trowel. Then a little more solution is applied on top so as to completely hide the mesh inside.
- I do surface finishing. The reinforced insulated surface of the gables is plastered, after which it is decorated with the selected decorative material. In the simplest case, you can simply paint the gable with facade paint.

That's all. Some still resort to thermal insulation of the interfloor ceiling, however, with such powerful insulation that I have described, I consider this procedure unnecessary.
Summary
Now you know how to independently perform the correct insulation of the walls in the attic floor and the floor with your own hands using mineral wool at the lowest cost. However, there are other options.
For example, sprayed polystyrene foam, with which it is easy to carry out thermal insulation of complex areas, including the Mauerlat in a heated attic. You can learn how to spray PPU yourself from the video in this article.
If you have any questions - ask them in the comments!
September 7, 2016If you want to express gratitude, add a clarification or objection, ask the author something - add a comment or say thanks!
Many owners of old houses are thinking about expanding their living space at the expense of the attic. However, they immediately wonder what to do if the roof is already covered, but the attic still needs to be insulated. In this case, the decision to carry out insulation work from the inside comes to the rescue.
Peculiarities
The process of insulating the attic from the inside cannot be called easy. To do this, you need to know the specifics of the roofing device, as well as figure out whether your existing roof is suitable for insulation. Indeed, not every attic can be converted into an attic area, especially if the roof is already covered.

There are three situations how a roof can be made:
- Between the rafters and the crate there is only a ventilation gap. In this case, the roof is considered absolutely unsuitable for insulation. You will have to completely disassemble the roof structure in order to insulate it.
- A polyethylene film is laid between the crate and the rafters, which acts as a vapor barrier. Such solutions can be considered optimal, and the roof - fully prepared for subsequent work on its insulation.
- A diffusion membrane is laid between the rafters and the crate. An option similar to the previous one. The presence of a waterproofing layer is evidence that the roof is prepared for insulation from the inside.

Thus, the main feature is the preparedness of the roof for further insulation.
Heaters
Thermal insulation of the roof of a private house, cottage, cottage can be carried out using various means. There are liquid materials, and elastic, and even those that have a relatively high density.
Before proceeding with the choice, be sure to pay attention to the design of the roof. It often happens that not every material is universal, so it's better to play it safe. The simplest example is the insulation of gable and sloping roofs: if almost any heater is suitable for a simple gable structure, then far from everything for a broken one.

If you do not consider liquid heaters, then the rest are sold in two forms - in slabs and in rolls. As you might guess, dense insulation is presented in the plates, and fibrous in rolls.
It should be noted that for insulation from the inside, not all options available on the market are suitable. This is due to the fact that it is much more difficult to insulate the attic from the inside due to the existing rafters. This increases the need for leveling cold bridges.


Materials for internal thermal insulation should be considered in more detail.
Styrofoam
Ordinary foam is one of the cheapest materials. It is sold in ready-made plates, which makes it convenient to use. Despite the fact that polystyrene belongs to budgetary thermal insulation solutions, it has many advantages.

So, the foam is not hygroscopic - it absolutely does not absorb water and moisture. To increase the water-repellent characteristics, it is enough to treat it with a special agent., which will clog the pores on the surface, and the water will simply drain over the foam plates.
It should also be borne in mind that the foam has a very low weight due to the presence of a large number of voids between the granules that make it up. This contributes to the fact that it will be possible to cope with the insulation work alone. Lightness has another advantage, which is to lighten the load on the roof structure.


Styrofoam does not conduct heat well, as a result of which we can safely say that it perfectly insulates the attic. The ease of working with it is another significant advantage of the material: you can cut the material, cutting out pieces of the right size, with an ordinary clerical knife.
However, there are also some disadvantages here. Firstly, the foam does not “breathe” at all, which can cause condensation to form. Secondly, the foam is susceptible to damage by pests, in particular rodents. Thirdly, polystyrene cannot be used to decorate wooden floors, since over time the tree will shrink, and gaps will appear between the foam plates.
How to insulate the attic with foam plastic is described in the next video.
Penoizol
Penoizol, or urea-formaldehyde foam, is a liquid version of the foam. The warming solution is prepared immediately before use. Its difference from many other mounting compositions, for example, PPU foam, is that it does not expand during the solidification process, retaining its original appearance and condition.
The mass resembles white foam, similar in appearance to shaving foam.

Liquid foam is often used to insulate roofs and attics during the construction phase, but can also be applied after the roof has been laid. Among other things, it can be used to additionally insulate the walls and floor of the attic.
The vapor permeability of the material, like that of a dense counterpart, is almost at zero, which makes it mandatory to take care of decent roof ventilation. However, the material does not conduct heat, therefore, it copes with its main function - thermal insulation - perfectly well. So if you do all the work properly, thermal insulation with penoizol will be a worthy and budget solution.

Extruded polystyrene foam or foam
Despite the fact that polystyrene foam and polystyrene foam belong to the same group, the second is more practical. This is largely due to the specifics of the installation. So, expanded polystyrene closes the rafters, which is why better tightness is achieved. Expanded polystyrene plates are easily fixed to each other with glue. Due to the low weight, installation can be done independently.

The material has a long service life, while it does not rot and is not attacked by rodents. The only serious drawback is the flammability of the material. You will have to take care of additional insulation of electrical wiring, because one spark can lead to a strong fire.
If no communications are planned to be carried out to the attic, polystyrene foam will be an excellent choice, especially considering that it can be covered with any finishing material. It is also compatible with wood, metal and any roof covering.


mineral wool
Mineral wool often acts as an alternative to foam. This material refers to rolled, which is due to the convenience of laying heat insulators supplied in this way. Mineral wool has a fibrous structure, which radically affects some of its properties.
So, mineral wool is an elastic material that is attached between the rafters. This does not require any additional fasteners. it is enough just to cut the slabs of cotton wool 2-3 cm wider than the portal into which the insulation will be inserted.

Rodents do not encroach on cotton wool, so you don’t have to worry about the integrity of the insulation layer. Mineral wool, however, belongs to the category of environmentally friendly heaters. Among other things, it guarantees excellent thermal insulation, despite the fact that it does not absorb moisture, and even if it gets wet, it will dry in record time. Also, it is better to use fibrous material if it is necessary to additionally soundproof the attic from the surrounding street noise.
Read more about attic insulation with mineral wool in the next video.
glass wool
Glass wool is one of the varieties of mineral wool, but there is a difference. First of all, it is worth noting that the materials are made from different fibers. This is where fiberglass is used. Due to this, the material is more elastic and durable. In addition, glass wool has the best sound-absorbing characteristics. At the same time, it is hydrophobic - it absorbs moisture well, but dries poorly, as a result of which, when wet, it quickly loses its operational properties.

Many fear that the use of glass wool for thermal insulation purposes within a dwelling will lead to disastrous consequences. Actually it is not. If you correctly carry out all the finishing work, then no harm to health will be caused. On the contrary, glass wool is even safer than styrofoam because it does not burn.
However, the material requires care when laying it. It will be necessary to take all safety measures, protecting the organs of vision, respiratory tract and skin from glass dust.

stone wool
Among all insulating wool, stone wool is more expensive than analogues, and all thanks to its special properties. Compared to others, it is itself safe and practically devoid of the shortcomings inherent in other samples. It is the most environmentally friendly of all, is not afraid of elevated temperatures, as it does not ignite, and also does not deform under the influence of heat.
Stone wool perfectly retains all extraneous sounds, while its sound-absorbing characteristics are an order of magnitude higher than those of other wools. Another advantage is the good vapor permeability of the material. It “breathes”, so condensation cannot form on it.

Stone wool can last for a long time. Such good performance properties are due not only to the strength properties of the material, but also to its ability to resist mechanical stress. Even if it is compressed, it does not deform.
Cotton wool is sold in the form of soft slabs, which are easy to cut into the desired formats if necessary. The only existing drawback is the high price, but the material is worth the money.


Ecowool
Ecowool is very different from other cotton wool in the form of sale. If other analogues are supplied in rolls or slabs, then ecowool is first crushed, and then applied by spreading the material using special equipment. It is believed that in this way it will better clog all existing cracks, forming a monolithic insulating coating.

There are two drawbacks here. First, you need to apply ecowool with the help of special tools. Secondly, the cost of the material also cannot be called democratic.


polyurethane foam
Foamed polyurethane foam also needs to be applied using special devices, which are quite expensive.
To avoid unprofitable spending on the purchase, it is easier to lease equipment - to rent.
The use of equipment and the application technology itself are quite complex, therefore, when working with the material, it is necessary to have at least some experience and knowledge on this issue.

Polyurethane foam is most similar to polyurethane foam, since it has a similar principle of operation. It expands in the same way when it solidifies, completely closing all the cracks and gaps through which a cold wind can penetrate or precious heat can escape. After hardening, the material becomes monolithic and smooth. This feature of it indicates that it does not absorb moisture, so you can do without the construction of additional hydro and vapor barrier layers.

All this makes polyurethane foam an ideal choice, regardless of what material the roof and floors are made of. The best solution when working with him is to invite a team of specialists who will perform the installation in a few hours on their equipment, doing everything in compliance with the technology.

Penofol
Penofol is a one-of-a-kind foil insulation. It is produced in the form of polyethylene foam boards, covered with an aluminum layer on one or both sides. Aluminum reflects heat back into the room, so heat loss is kept to a minimum.
However, it is important to ensure that the foil side is turned inside the room and not outside when laying.
Penofol is absolutely safe for humans and animals, although it is not a natural material. Due to the aluminum coating, it does not conduct heat, which gives grounds to assert the excellent thermal insulation properties of the material. Among other things, it may not be necessary to make a vapor barrier for this material, since, with proper installation, it does an excellent job of vapor barrier itself due to its special texture.

If you plan to operate the attic for permanent residence, then choosing penofol, you will not regret it.
Room preparation
Having decided to insulate the attic from the inside, you first need to properly prepare the room itself for work. Keep in mind that not every attic is suitable for insulation. Check if the ceiling height is 2.5 m in more than 50% of the area of the entire attic. If not, then you should not deal with warming - it will still be impossible to live here.

Next, dismantle all existing sheathing material, exposing the rafters. Installation of insulation will be carried out either on top of them or between them. Check the condition of the roof, as well as the presence of vapor and waterproofing layers. Keep in mind that the roof, which has smudges, must first be fixed, and only after that you can proceed to the insulation work.
It is important that they are in good condition, have no gaps, except for ventilation.

vapor barrier
When creating an attic floor for winter living, especially if the winters in your area are harsh, the first thing to check is the presence of a vapor barrier. As a rule, it is done immediately when the roof is mounted, even if they do not plan to use the space under it as an additional room in the future. If there is no vapor barrier, then the roof will have to be redone from the outside, dismantling roofing materials. Unfortunately, it is impossible to lay a vapor barrier layer from the inside, because it must lie between the rafters and the counter-lattice.
Various materials can be used to create a vapor barrier. All of them have their advantages and disadvantages, as well as the specifics of combinations with insulating materials. All this must be borne in mind when moving on to insulation work, so it makes sense to dwell on vapor barrier materials in more detail.
In addition, it will help you make a choice if the roof of your house does not yet have a vapor barrier.

Polyethylene film
Despite the cheapness of the material, many builders strongly discourage its use. This is due to the fact that it is unsuitable for creating a vapor barrier layer in Russian realities. The material does not "breathe" at all: it does not let in not only moisture, but also air, and this creates problems with circulation and, accordingly, the greenhouse effect. So, the condensate cannot evaporate and, flowing down, falls on the thermal insulation.
Therefore, if in your house the vapor barrier is still made using plastic film, refuse to buy water-absorbing heaters, such as glass wool.
Over time, the film tends to collapse and crack, so after a short period of time you still have to completely disassemble everything in order to replace the fragile material that has served its purpose.

glassine
Glassine is suitable for both steam and waterproofing, so it has received universal recognition. However, it is necessary to act here in two directions. Firstly, a layer of glassine will need to be laid between the roof and the counter-lattice, and secondly, on the insulation from the side of the room. If all work is done correctly, this guarantees reliable protection and an optimal microclimate in the attic. Above, between the roofing and the counter-lattice, a double layer of glassine should be laid.. Only then can the optimum effect be achieved.
Glassine is more needed to protect the insulation from moisture, so any one can be chosen as an insulating material. Try to choose options that do not deform under the influence of temperature changes, and are also not subject to attack by rodents. Both cotton options and penoplex are perfect.

Ruberoid
Roofing material has been used as a vapor barrier since the times of the USSR, so in old houses you can find just such material between the roof and rafters. Nevertheless, if possible, such a layer will need to be dismantled. This is due to the fact that the roofing material is a rotting material, and in accordance with the standards it cannot be used for hydro and vapor barrier in buildings with a long service life.


If it is decided to leave the roofing material, then you should not expect good vapor barrier qualities from it. For this it is better to lay an additional layer of special vapor barrier material, at least the same polyethylene film.
It should be borne in mind that condensation may accumulate on the roofing material from the inside, which will lead to wetting of the insulation. So, if the insulation is temporary (for example, it is carried out in winter, and everything is planned to be redone in the spring), then foam plastic can also be combined with roofing material.

Izospan
The material isospan consists of polypropylene. It is one of the most recommended for the construction of vapor barrier due to the fact that it was designed only for these purposes.
Izospan collects condensate and further prevents it from getting on the heater. The two-sided texture of the material is responsible for this. On the one hand it is smooth, and on the other - a little rough. On the rough side, drops of condensate linger and evaporate. With the help of isospan, they vaporize not only the roof, but also the walls of the attic.

Depending on the properties of isospan, markings differ. The most expensive, but materials with the effect of energy saving FB, FS, FD, FX are considered effective. They have a foil coating that reflects heat back into the room, thereby reducing heat loss to almost nothing. At the same time, the special texture still prevents condensate from rolling off and spoiling the insulation.

waterproofing membrane
You should not attribute to waterproofing membranes all the same properties that are inherent in specialized vapor barrier films. Indeed, both of them collect and evaporate condensate, but the main task of waterproofing membranes is to protect the house from moisture, not steam. In addition, waterproofing membranes have a wider range of applications, from insulating attics and basements to protecting swimming pools.

Waterproofing membranes are available in different types. There is diffusion, superdiffusion, and also anti-condensate, which is more suitable than others for a vapor barrier role. If you find, having disassembled the sheathing material, one of these membranes, consider yourself very lucky.
You can lay any insulation without fear that it will get wet and quickly lose its qualities. In addition, the microclimate in the attic will be excellent.

Penofol
Penofol is both an insulating and a vapor barrier material. However, it can only be laid when a waterproofing membrane is found between the roof and the rafters.
The reflective foil surface itself will collect condensation and help it evaporate, but the second “bare” side must be well protected from moisture. Only in this case, the variety will cope with both steam and thermal insulation.

Material consumption
The calculation of the material is made at the stage of inspecting the roof for damage. Here it is important to consider the pitch between the rafters and the distance between the vapor barrier and the interior space. The number and thickness of the plates depends on the internal space: whether the thermal insulation will be laid in one layer or in several. The size of the plates depends on the distance between the rafters.
Please note that if the step between the rafters is more than 60 cm, then it will be necessary to independently prepare an additional crateto make the fixing of thermal insulation possible.
As for the sprayed heaters, in this case it will be necessary to calculate the volume. Beforehand, it will be necessary to clarify such data as the estimated thickness of the heat-insulating layer, the perimeter of the rooms and the height of the walls, as well as the density of the insulation. We must not forget about the presence of windows and doors. It is best to use a special calculator.


Warming scheme
Since when insulating the attic, the roof is mainly insulated, it makes sense to consider the scheme of laying layers only for it.
Starting from the outside, the cake will look like this:
- On top is the roofing material, which is not touched. Under it are a crate and a counter-crate, which serve as a frame.
- Next comes a layer of hydro and vapor barrier, which is also the original one.
- A layer of insulation is laid out under the waterproofing. Depending on the width of the step between the rafters, an additional crate can be built here.
- From the side of the room, a vapor barrier layer is attached to protect the insulation.
- Finally, finishing is done.

How to insulate with your own hands?
To insulate the attic with your own hands from the inside, you need to keep in mind the layout of the layers one after another, and also follow the following step-by-step instructions:
- It is necessary to retreat a little from the existing waterproofing layer, leaving an air opening. This will allow the insulation to "breathe".
- After that, the heater is installed. Depending on the material, it can be laid between the rafters or on them, as well as sprayed. How it is necessary to handle this or that insulating material is written in the instructions for it.
- Next, install a vapor barrier film. If a gap between it and the insulation is possible, then the connection to the walls, ceiling and, in the case of an attic, to the floor must be airtight. Otherwise, condensation will form on the side of the film that is turned towards the insulation, and this should not be so.
- The last step is finishing. There are many options to choose from, but drywall, clapboard, or MDF boards are usually purchased.

- it is better to buy cotton wool insulation not in rolls, but in mats, so they do not need time to “track down”;
- to insulate the floor, you need to choose foam or other inexpensive material;
- the insulation does not need additional fixing, however, if anything, you can use nails, adhesive tape or a construction stapler for this.